fire shader part THREE
From the last part:
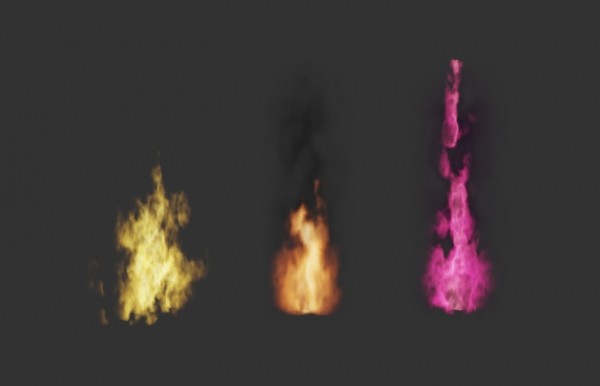
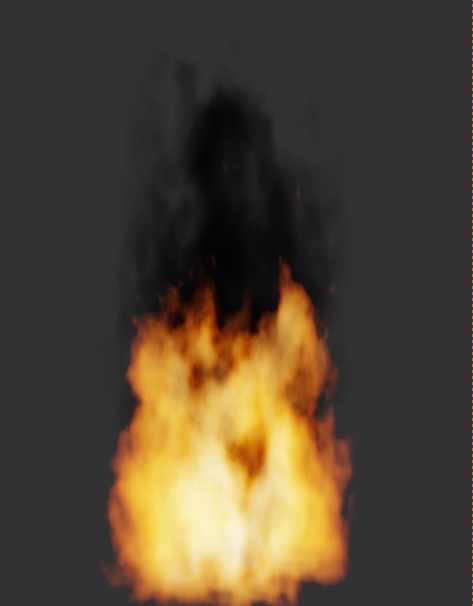
We managed to have a fireball now it’s time to shape it like a real fire and add some smoke.
looking at reference at this stage could be a good idea. Google images is your friend
Most of the fire on the search above are triangle shaped, for now will concentrate on this shape but just before doing that, we’ll make some room for the smoke, let’s scale our default cube by 2 in Z and apply the scale.
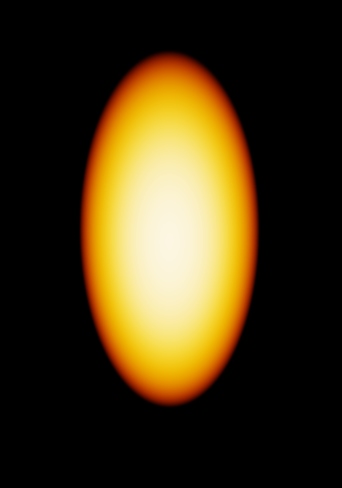
without deformation the fireball look like that
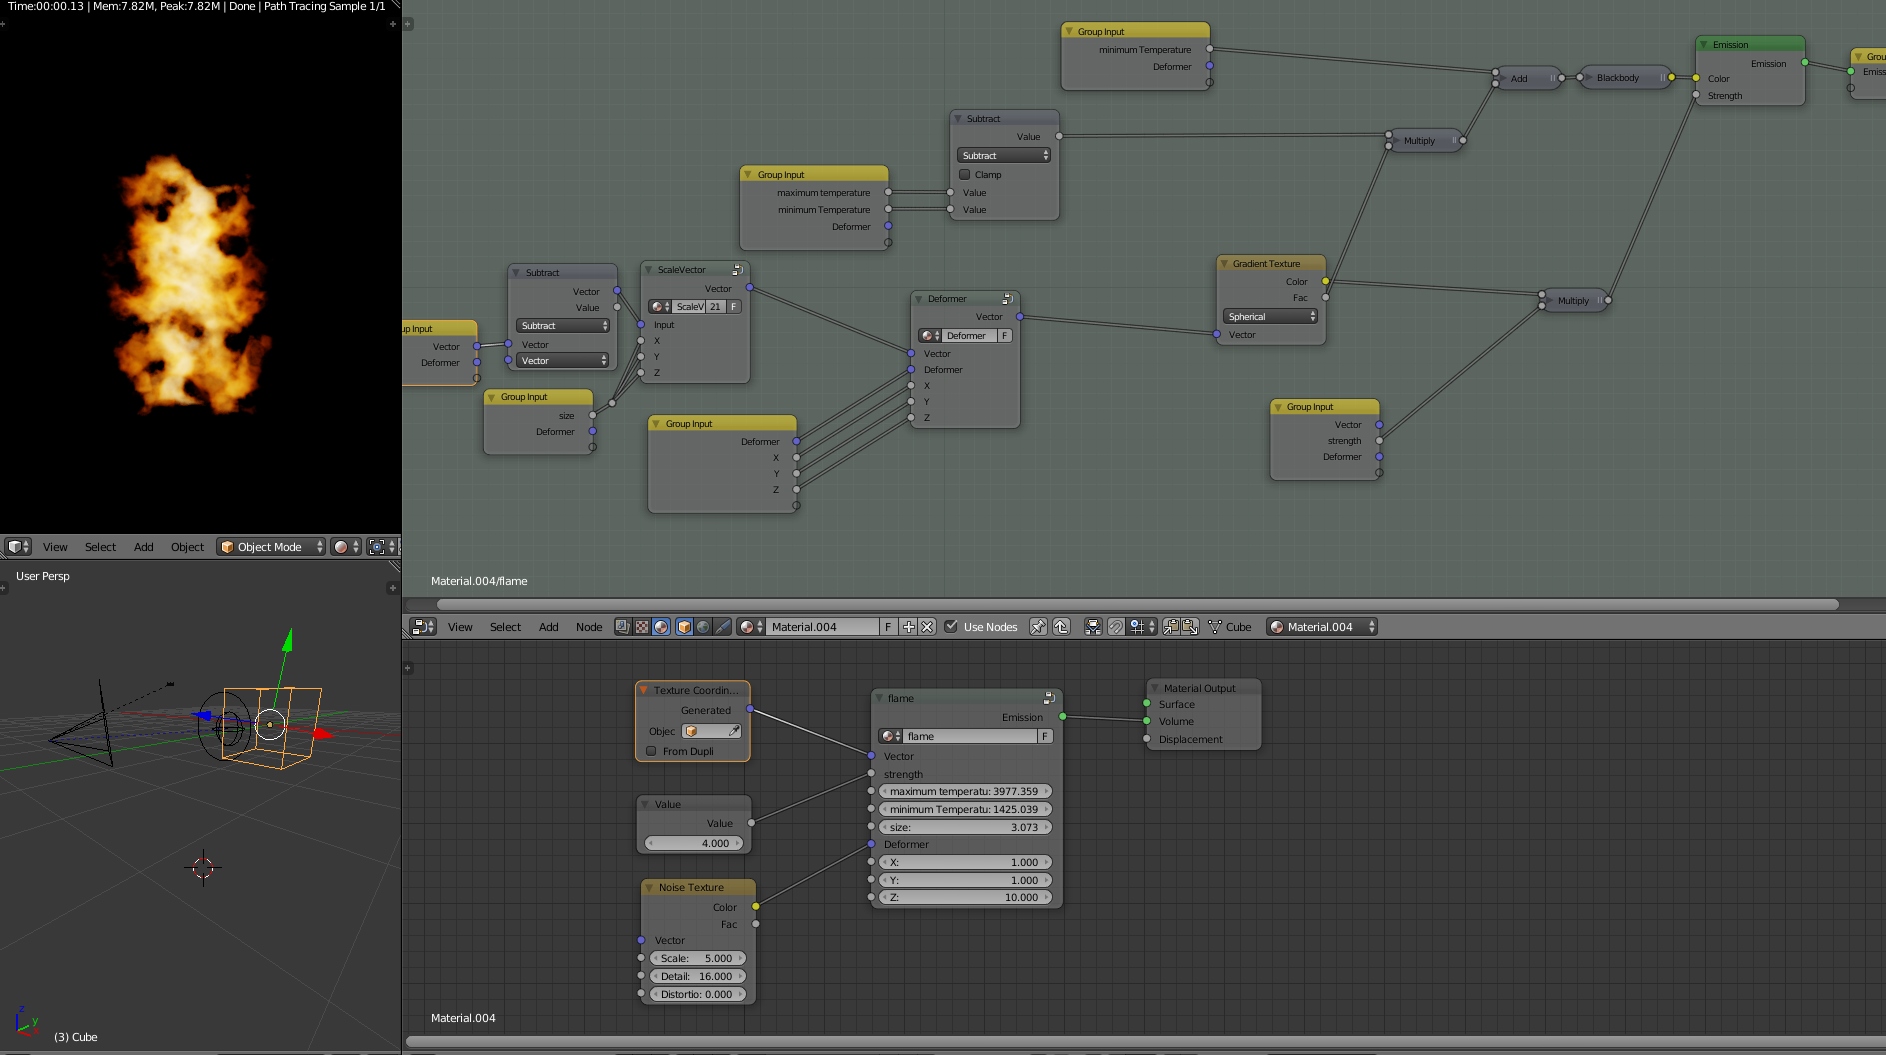
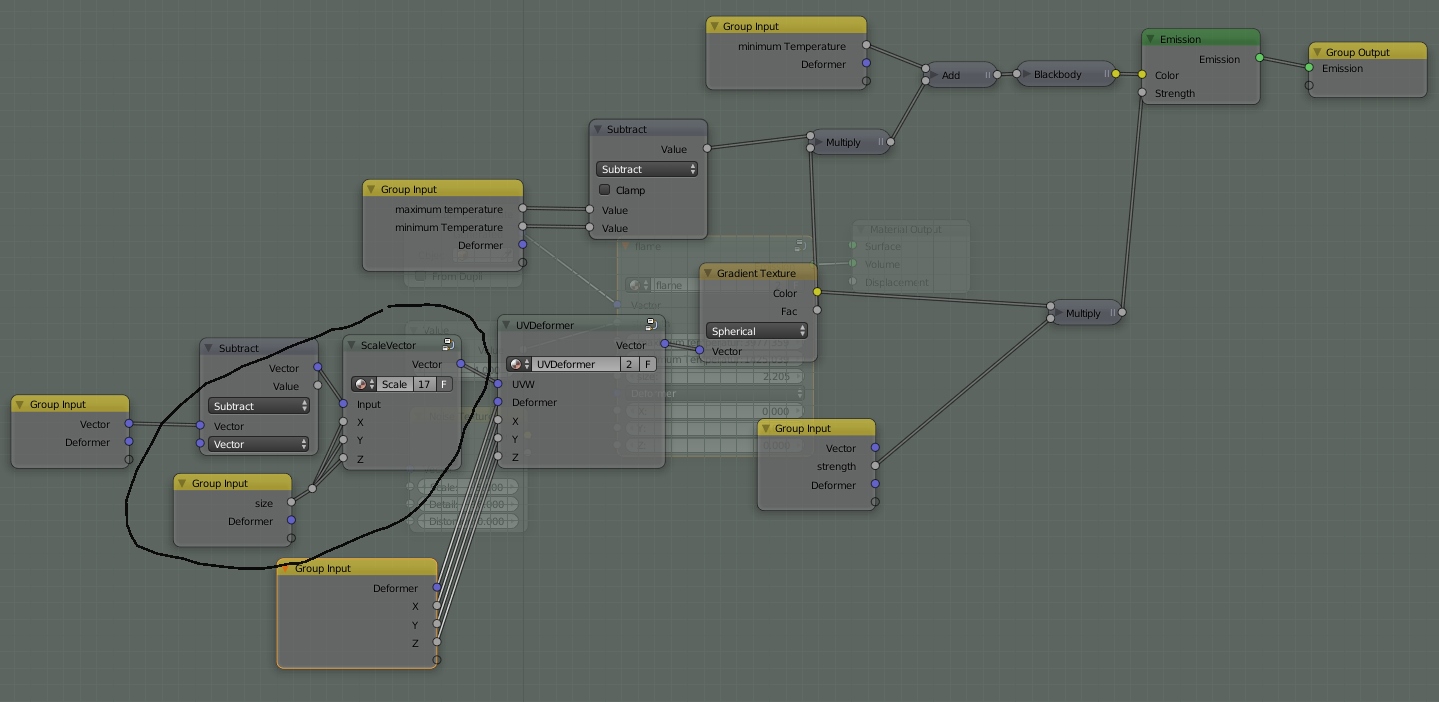
So to correct the Z scale inside the Cube or inside the UVW bounding box we need to make some other parameter public, instead of one value for the three scale parameter we’ll publish each one and then do the same for the vector that control the placement of the sphere, using a combine XYZ, like below:
from that:
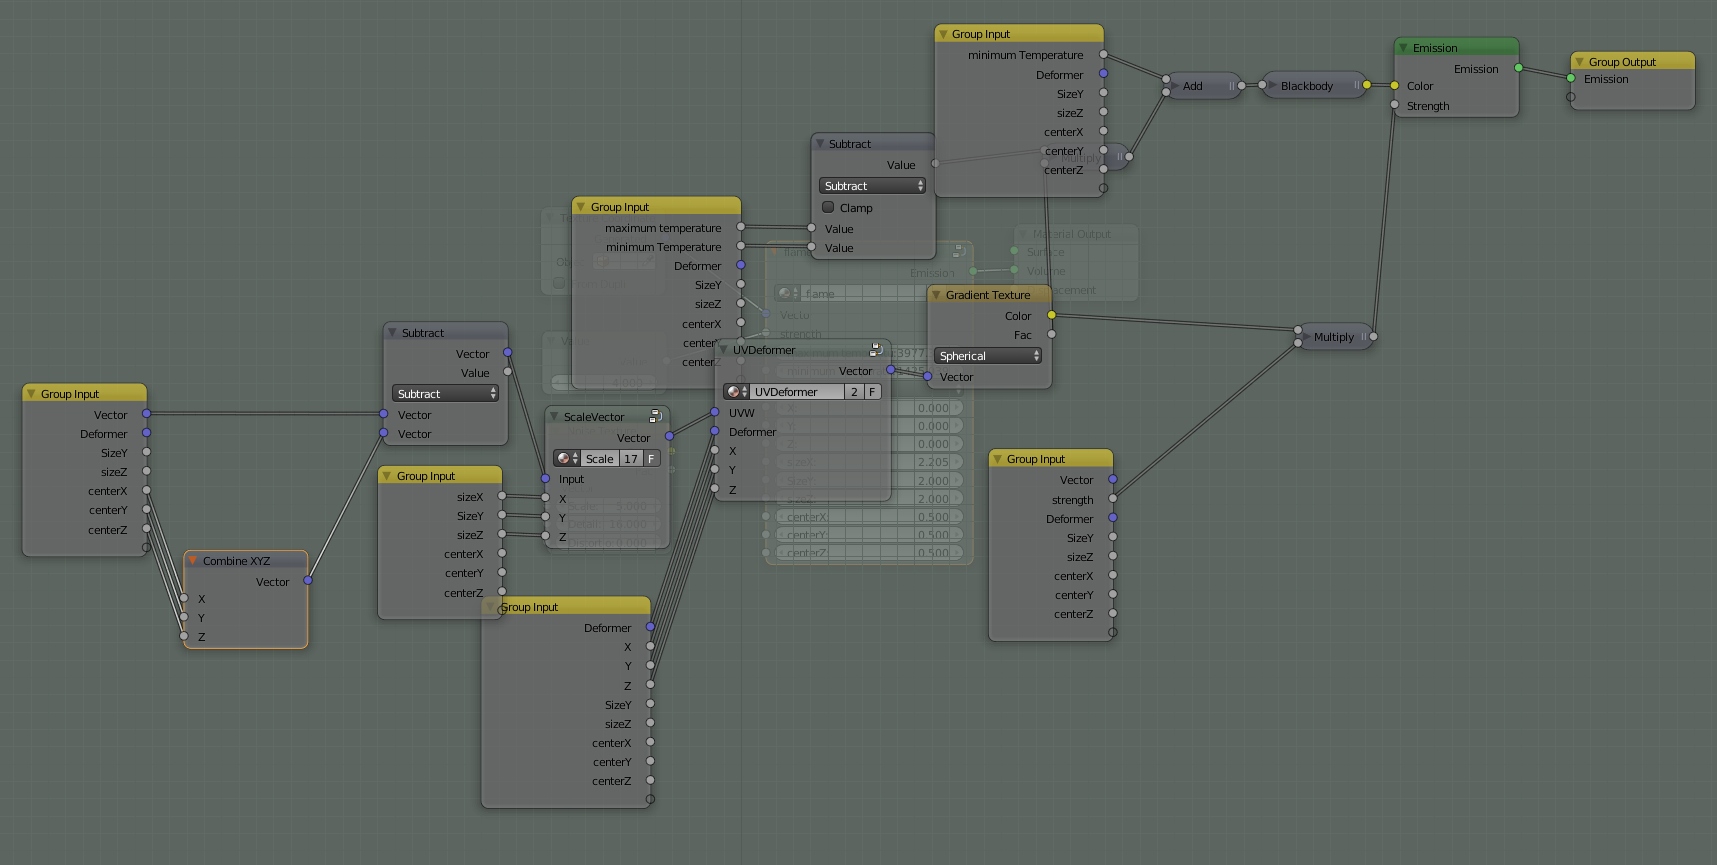
to that:
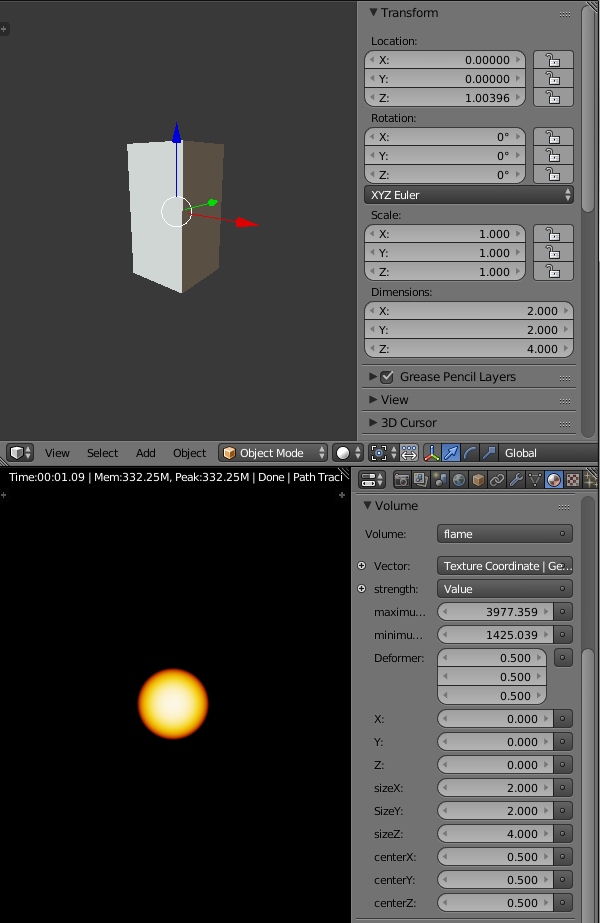
wish allow us to do that :
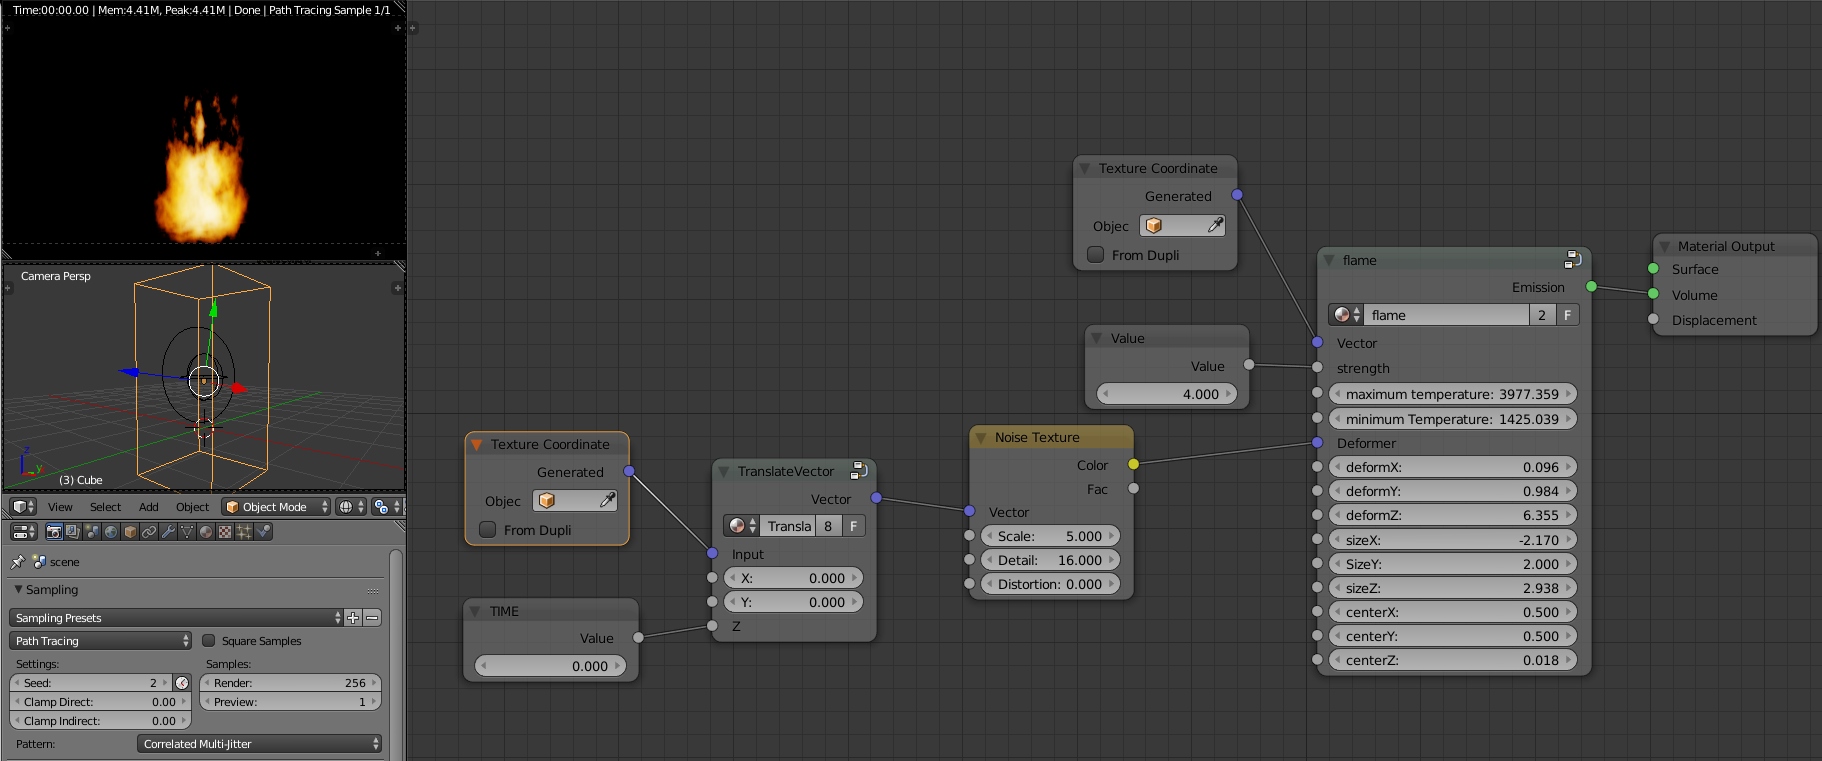
let’s deform it again with the noise, we will use a few one with different scale, and anime them separately,
the first one with a scale of 5 then play with the deform sliders and also the size. Once you are satisfied it’s time to animate the noise to see if it really works.
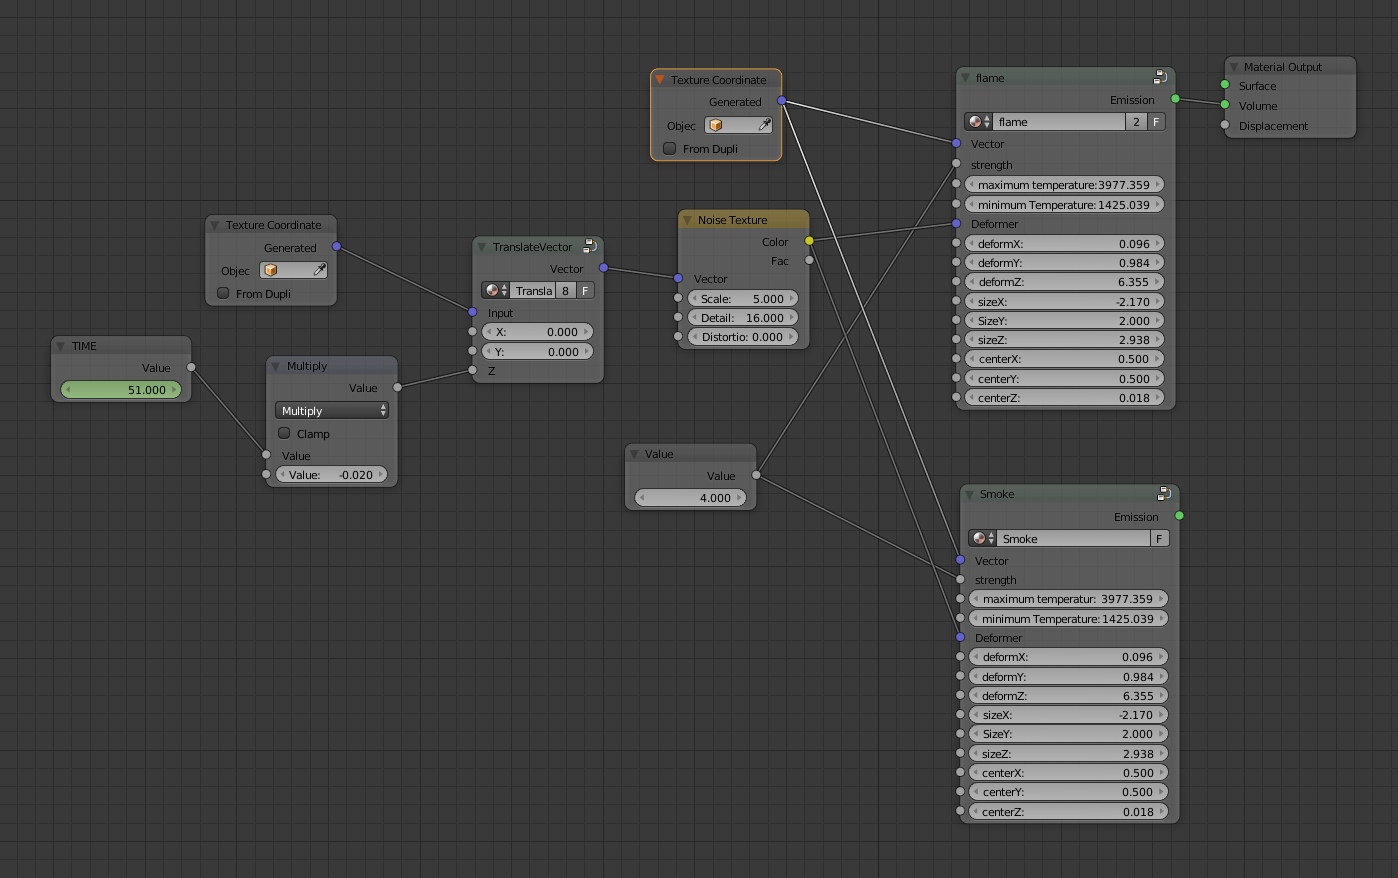
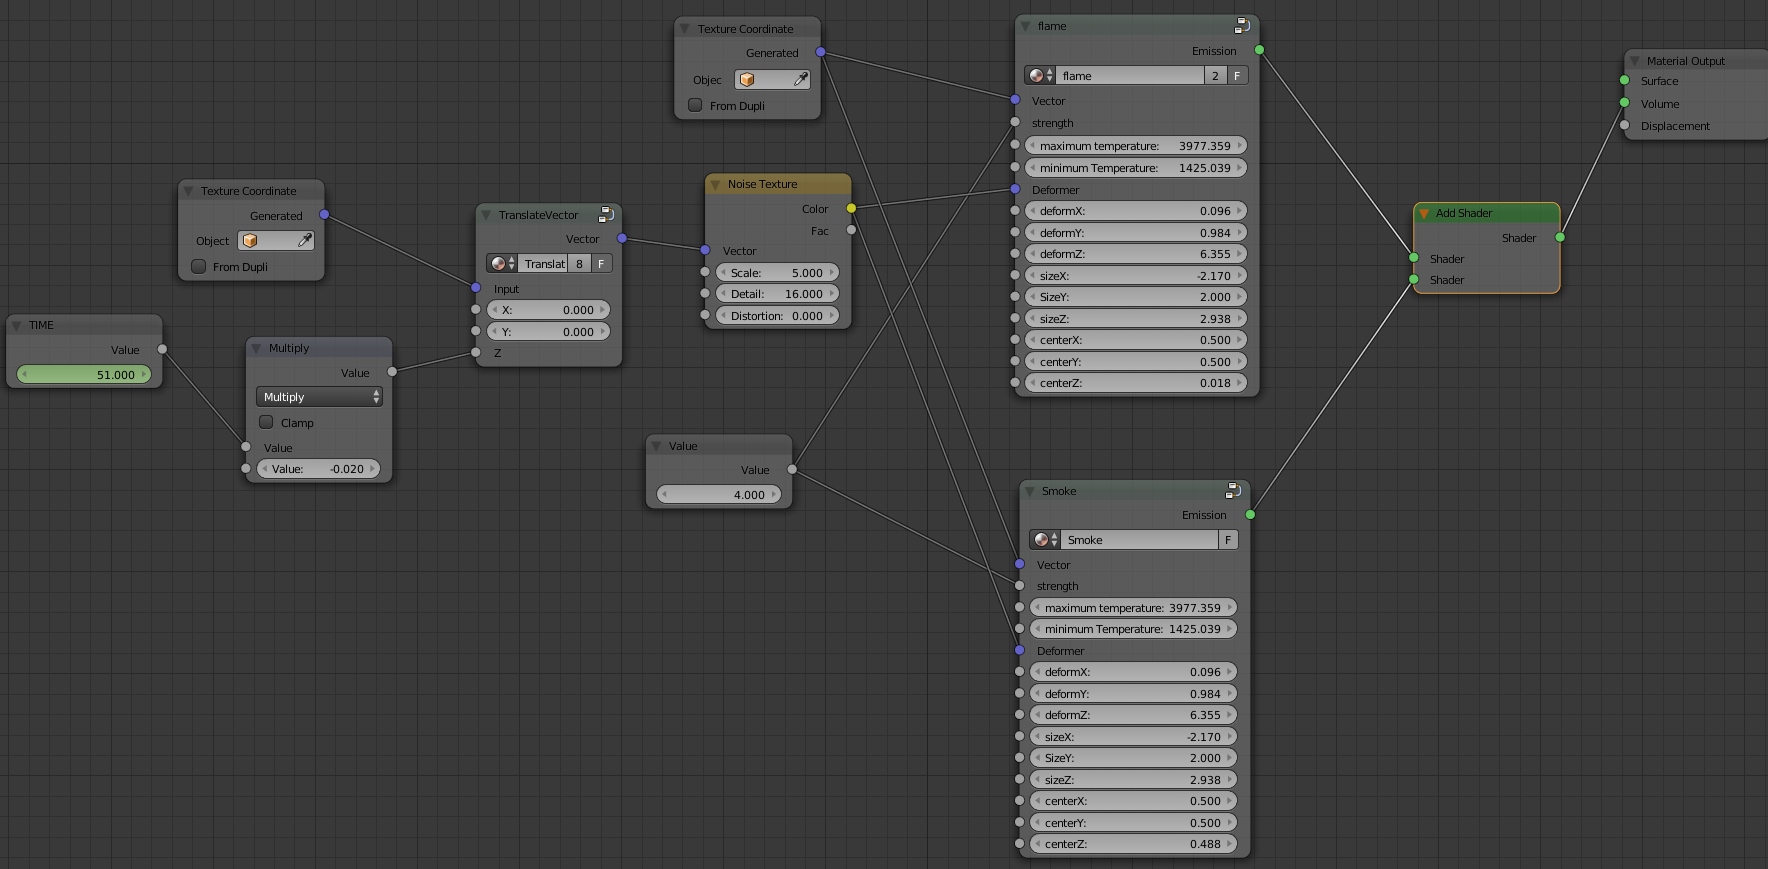
To do that plug a texture coordinate / generated into the vector slot of the noise and a translateVector group (done in the previous lessons) between them, and a input/value node into the Z coordinate in the translateVector group, like that, call it TIME:
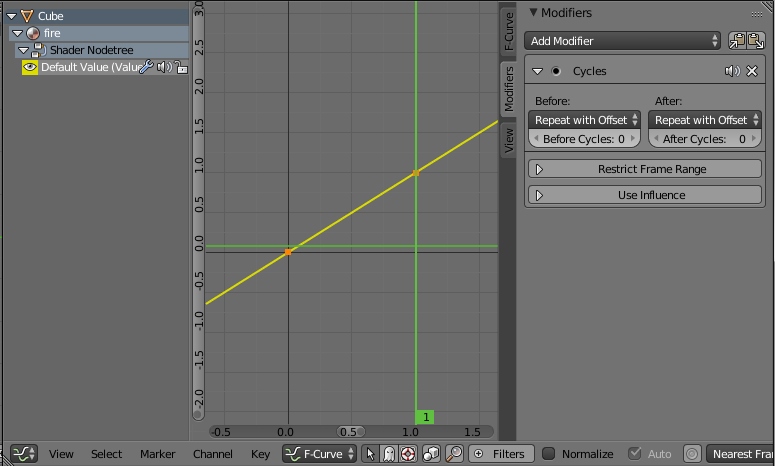
animation ! go to frame 0, set the time node value to 0 and press “i” with the mouse over the time node value. repeat the same at frame 1 and a value of 1.
in the graph editor, add a cyclic modifier on the time node and chose for both Before and after parameter : repeat with cycles, don’t touch anything else
if jump to nest frame, 2,3,4, you’ll notice the fire is moving a lot, so let’s slow it down with a multiplier at 0.01
Tada !
well, it’s a bit fast and it looks like it goes backward in time, let’s change that, try -0.02 in the multiply node, before rendering you can move in the time line to check:

Much better, now the smoke. let ctrl+shift+d, to duplicate with input still connected the fire node group ad make it unique by clicking the little 2 or 3 after its name and rename it smoke
Enter the node group and add a Volume absorption BSRDF, set the color to black for now and plug the multiply driving the emission of the emission in the density of it.
Go back one level and add an “ADD” shader and plug both group Flame and Smoke in it, send the ADD shader in the volume Material Output.
We see no difference for two reason, first the background is black, second reason the smoke and the flame are exatly at the same place let’s offset the smoke a little bit and create a grey world background
if you want to see my exact parameters :
It’s time to render an animation to see if the smoke is moving convincingly
much better but oups I forget to shape the fire.. how to do that, currently the bottom of the “sphere” is outside the bounding box or our cube and we have access, I mean published a few parameter and the most interesting one is Scale, basically we want the base to be wider and the top to be narrower. let’s do that.
We have deformed the UVW inside the box to deform the sphere but the original ones still exist, you remember those one ?
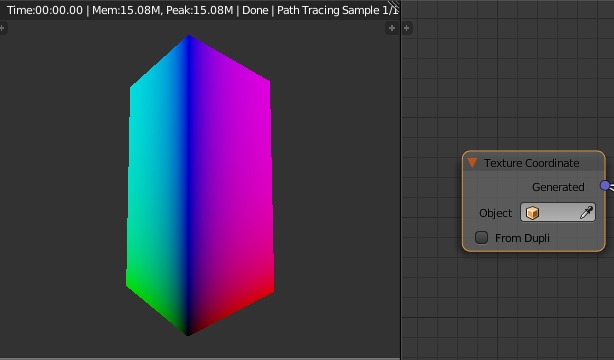
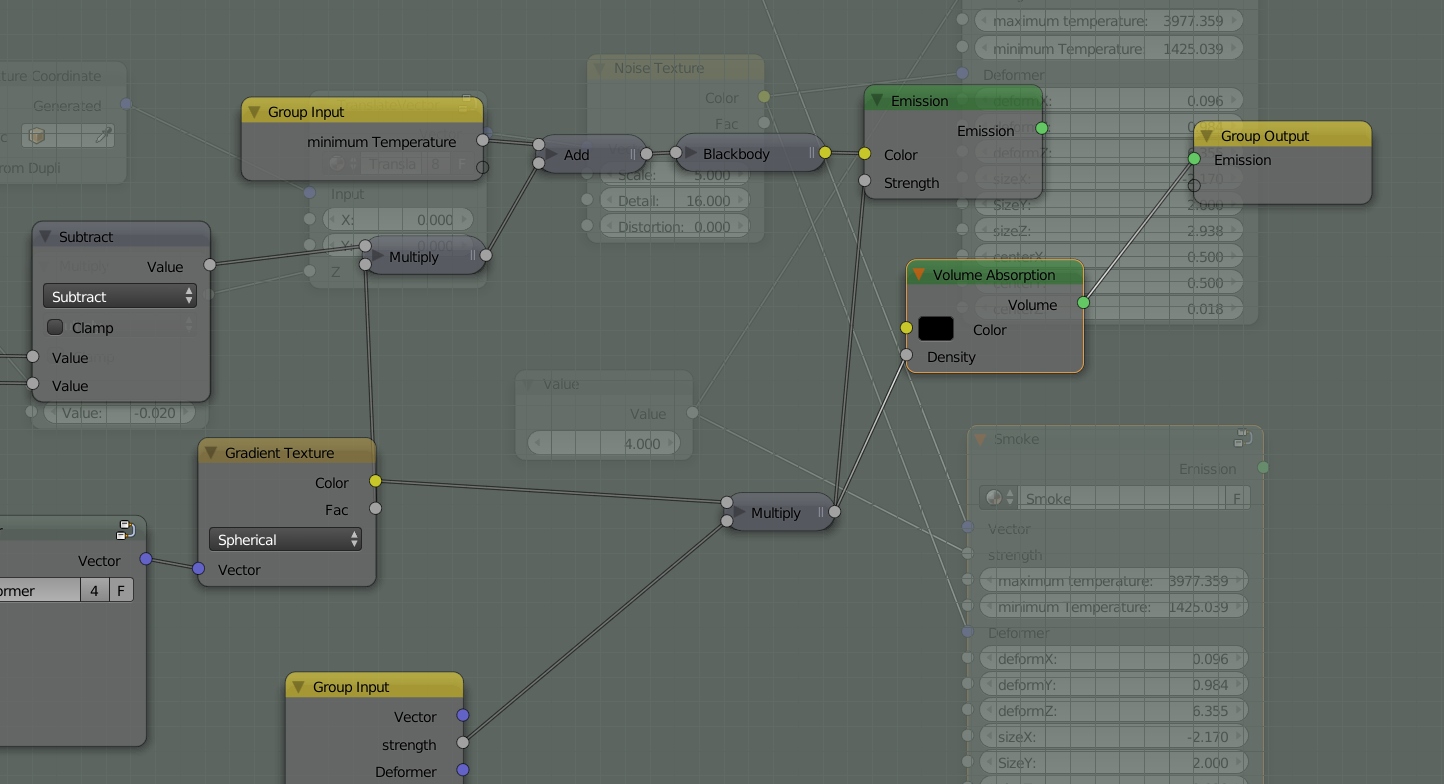
so based on the blue, or Z value we will change the scale with a curve, it make the shaping more intuitive than just math. So we just need to separate XYZ from the generated UVW texture coordinate, plug it in a color curve, give the curve a water drop shape and multiply it with a control value , all that in the X and Y scale like that :
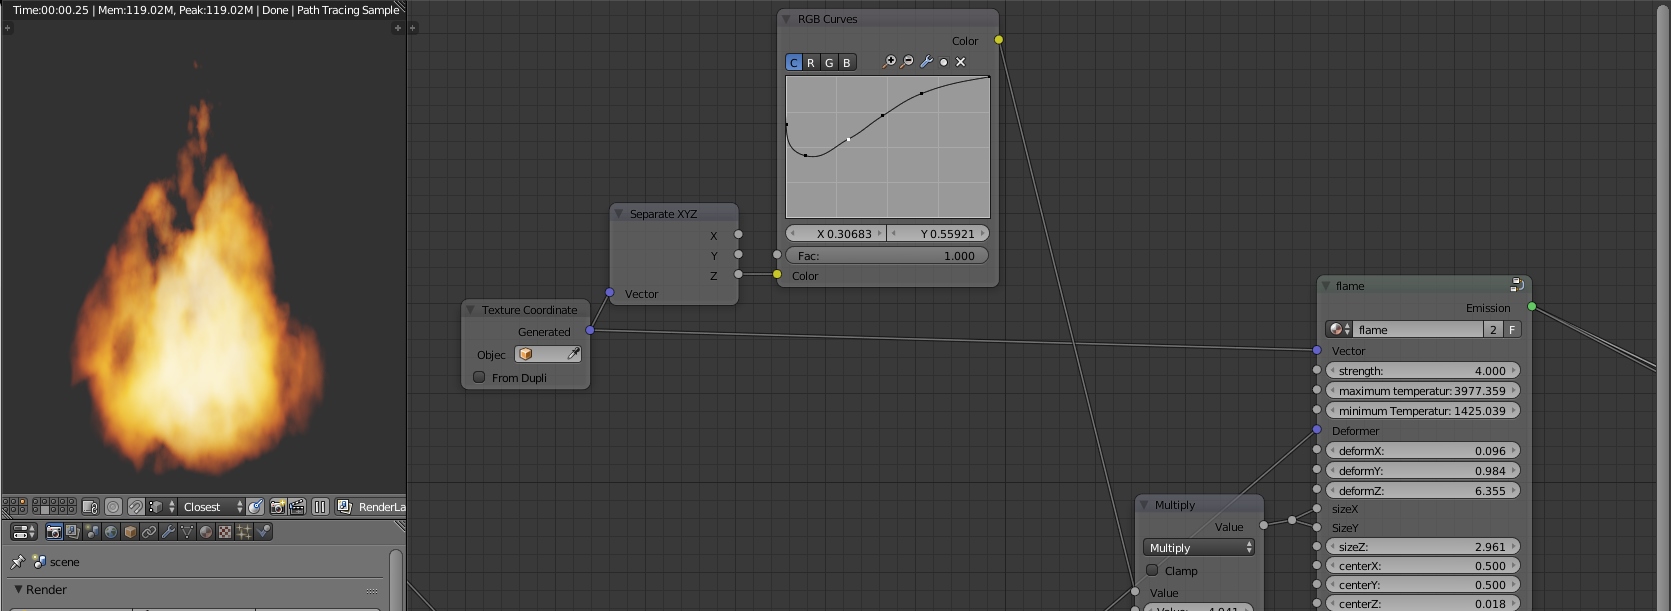
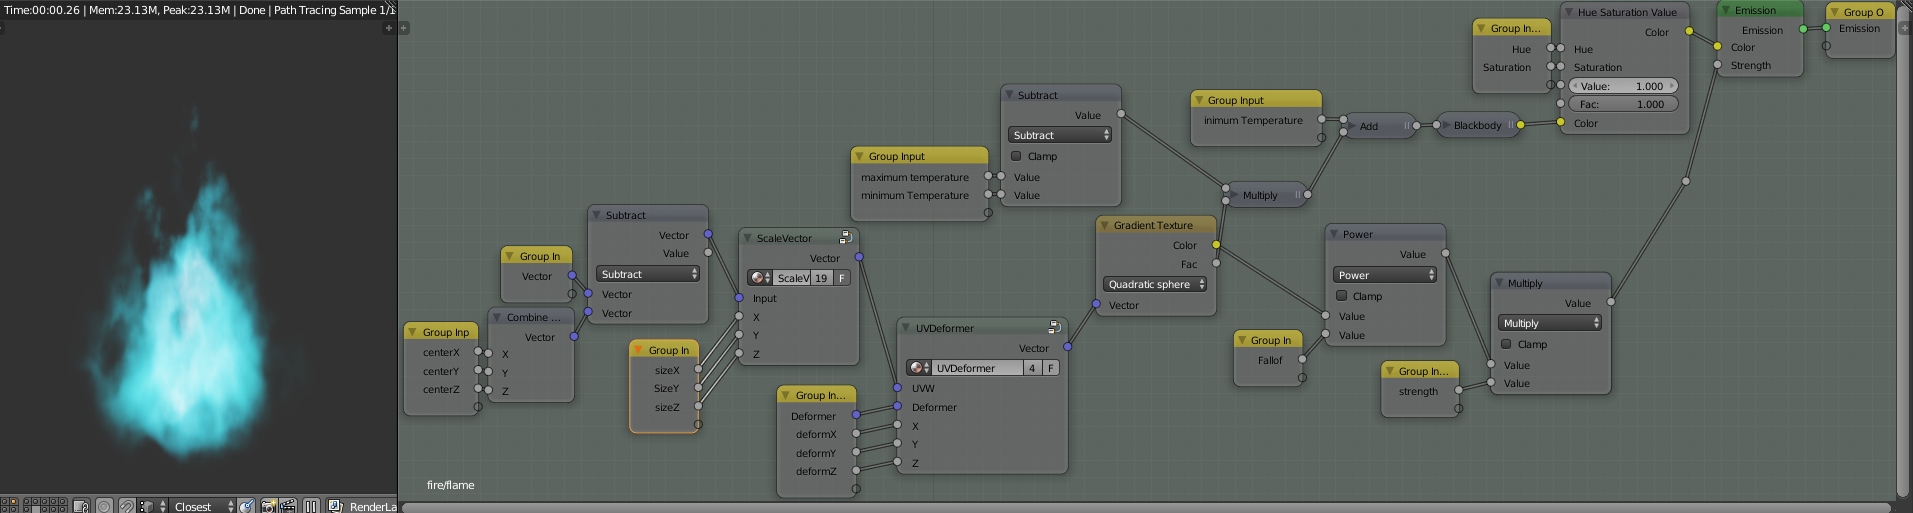
When zoomed like that we the that with this strength (4) the flame is a bit hard, a bit sharp, to help with that we could change the spherical to quadratic or use a math/power node with the second slot publish with a beautiful name : falloff, because it’s what we want, controlling the falloff of the strength (hope it make sense). while we are inside the node group, we can also add another node to control the flame color and saturation, the fastest way is tu add a Hue Saturation Value node and publish only Hue and Saturation leaving the Value to one, as it’s already controlled by the strength parameter of the node group. All that give this :
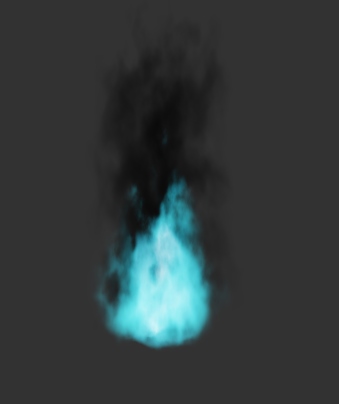
By putting back the smoke it looks like that :
it’s time to redo the smoke shader from the updated flame group
again replace the emission with an absorption one, remove all the color from the group and also from the published slots, publish the color of the absorption part.
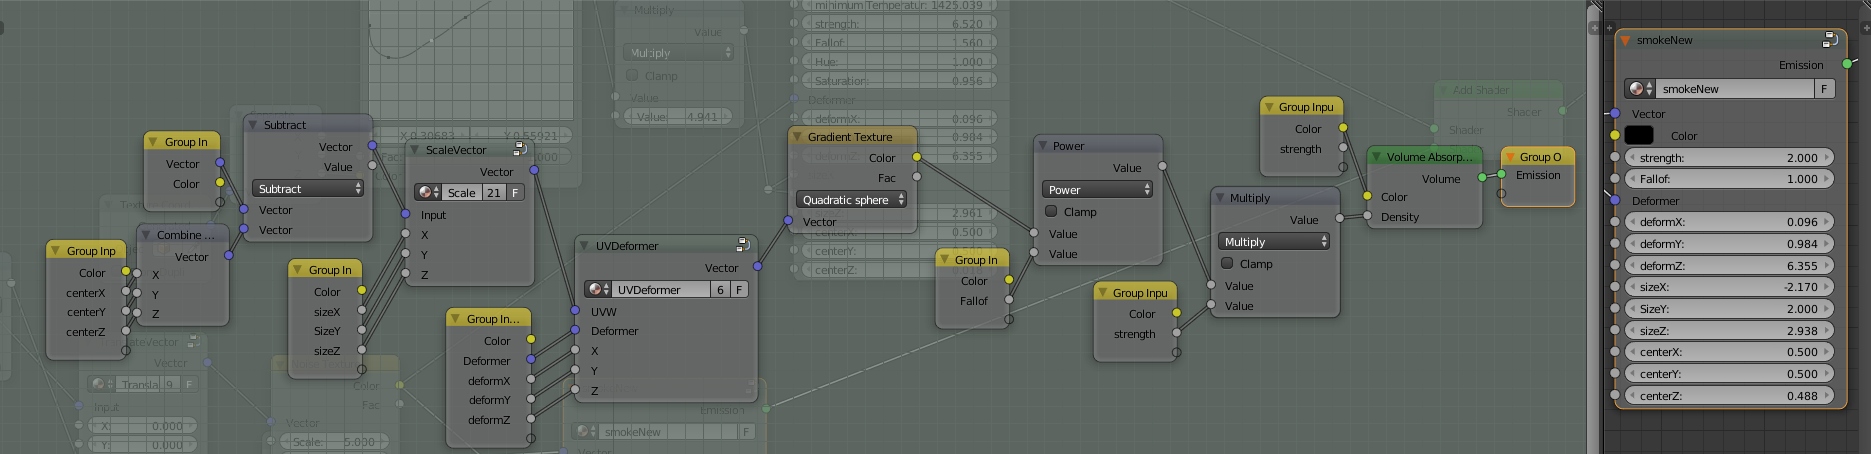
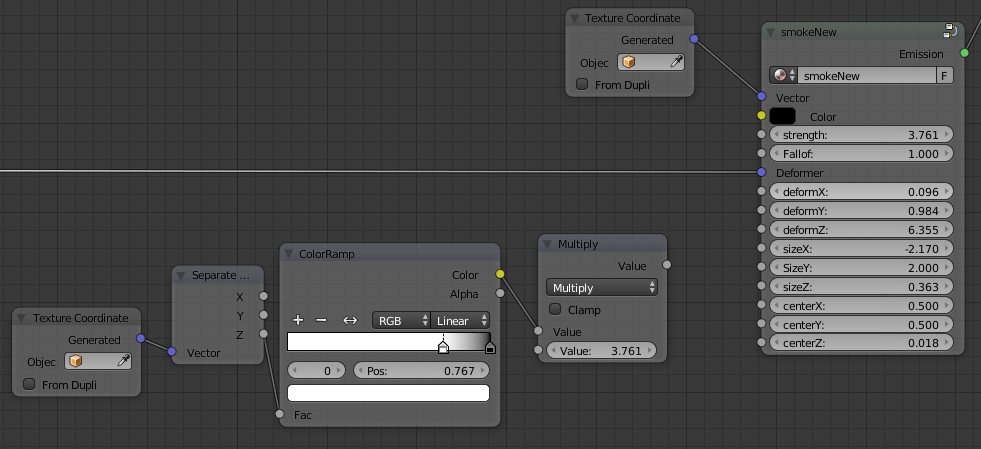
The last thing to do is to fade the smoke at the top to hide the box limit, so on the Z axis, with the same trick as for the shape but with a color ramp this time use the z vector of the generated coordinate :
before: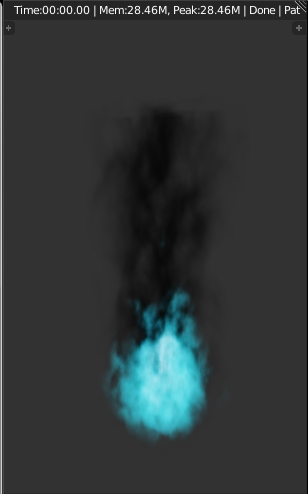 after:
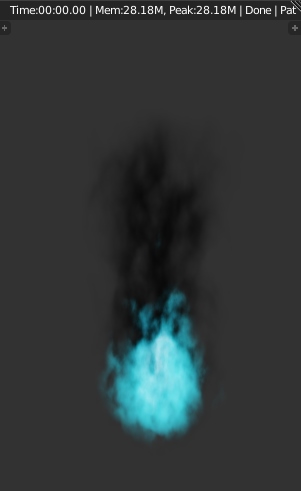
and the graph:
and we are done for part three !
Now it’s time to make your own, try varying the speed along the Z axes(slower speed at the bottom for exemple), combine different noises in the deformation to make some wind, some turbulences !
Happy blending
3 comments
Overall great tutorial. However I feel like you never really made it clear how to create the “translate vector” node. Is it just like the scale vector node but with add nodes instead of multiply?
I will correct that asap. thx
very novel approach, kudos!