
Sand Shader
Well, it’s been a while since last post …
I now live from my blender work and I’m happy doing it. Unfortunatly I’m not allowed to show most of the things I’ve done but it goes from ArchViz and packshoots to complete TV ads, interestingly I was asked to work on blender for file sharing purpose(lucky me).
During my free time I’ve developed a way for rendering clouds and fire without using simulation, using volumetrics on gpu, one week after that a new client ask me to make a a commercial with 5 shots with an air plane above the clouds, we didn’t found stock footage with the storyboard’s camera movement so I did everything, plane and clouds in 3D (lucky me 2)
Also during my free time I’ve made an uber shader wich work the same way as the disney brdf one plus some extra features.
I also discovered two friendly community on discordapp.com, it’s a pleasure to speak about topics that matter to me all days. We share tips, critics on wip an general humor things, perhaps you should give a try if you need help AND want to give some.
french one, the blender lounge channel
english one: blender channel
Those instant message group are fine, but I find that more and more, I need to repeat, repost things because peoples aren’t always online and I’ve been asked to summarize my littles researchs on a page for later so let start now.
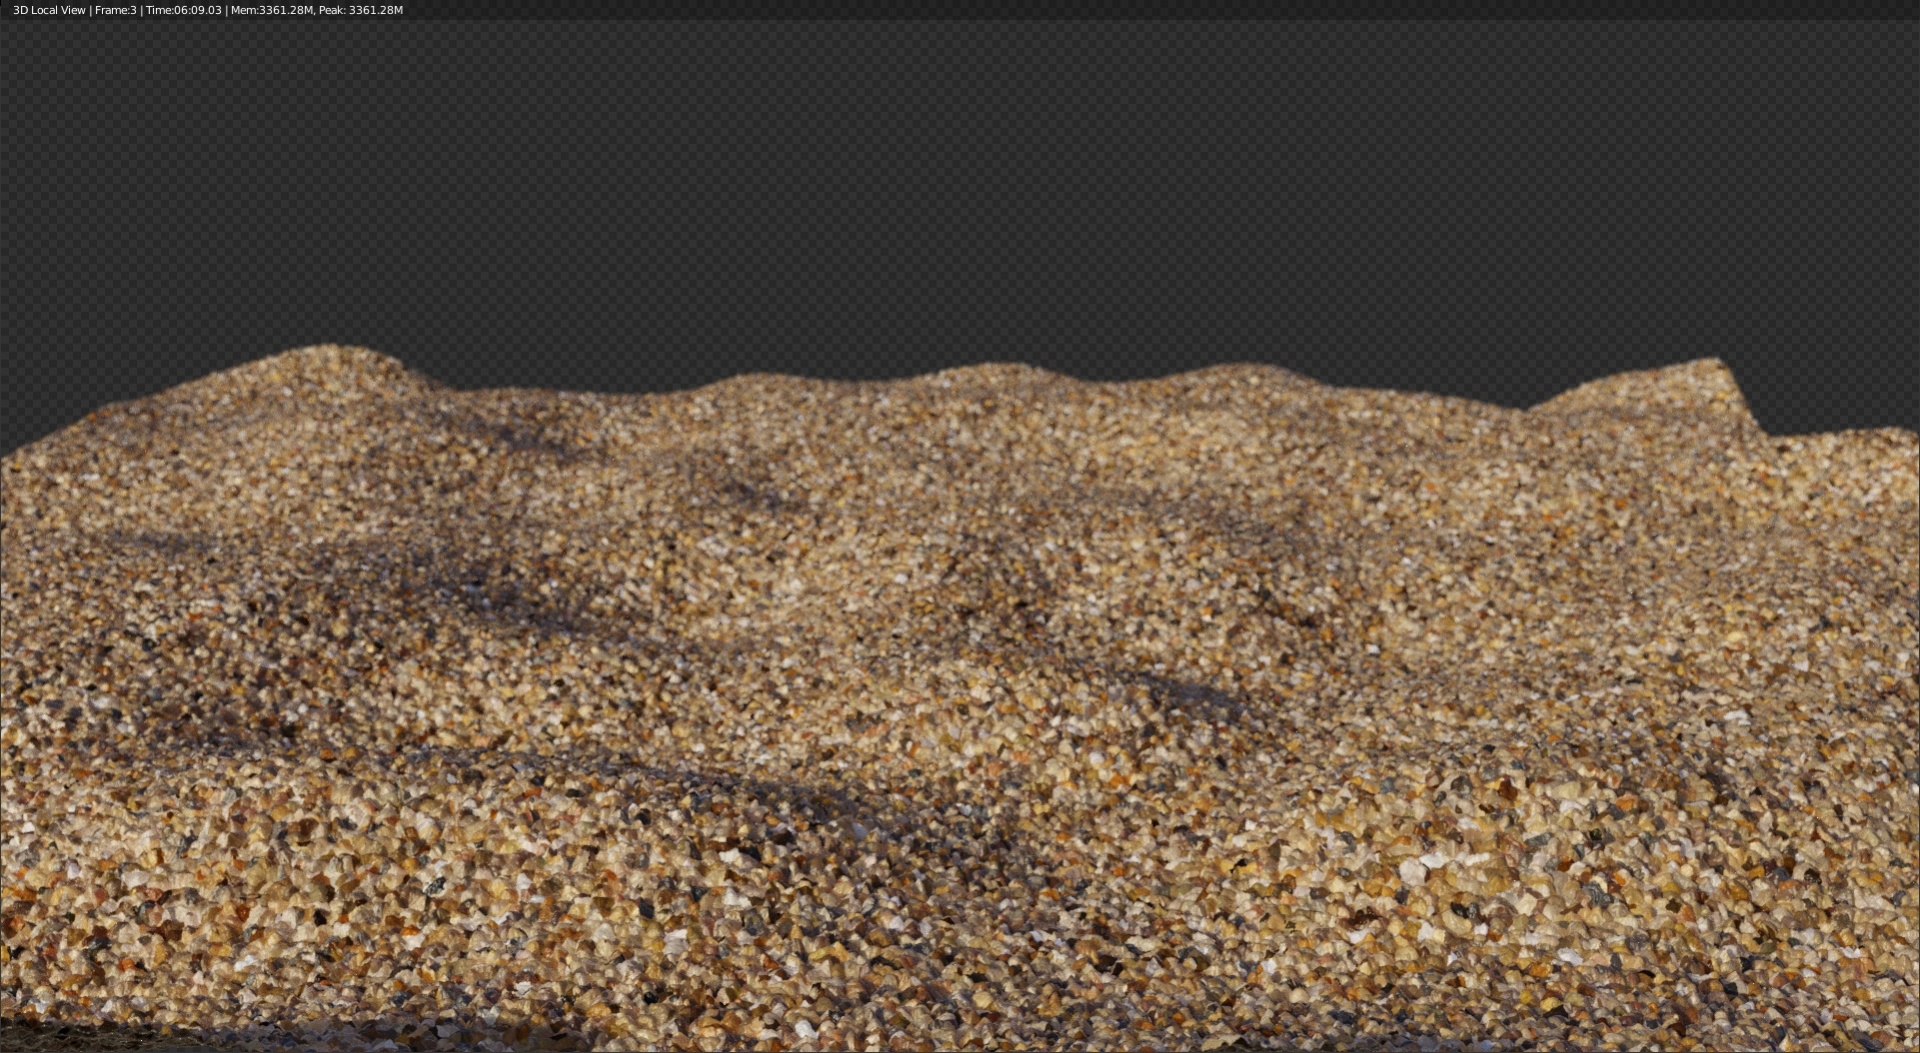
I ‘ll talk mostly about procedural texturing or cycles tricks and optimisations. today a sand shader :
The day after FXguide published a paper about the sand in Pixar shot movie, Piper I decided to give it a try, frankly I was sure approachable result would be possible without 16K texture or 5k poly sand grains.
The paper in question : The tech of PIXAR part 1: Piper
The Sand Shader
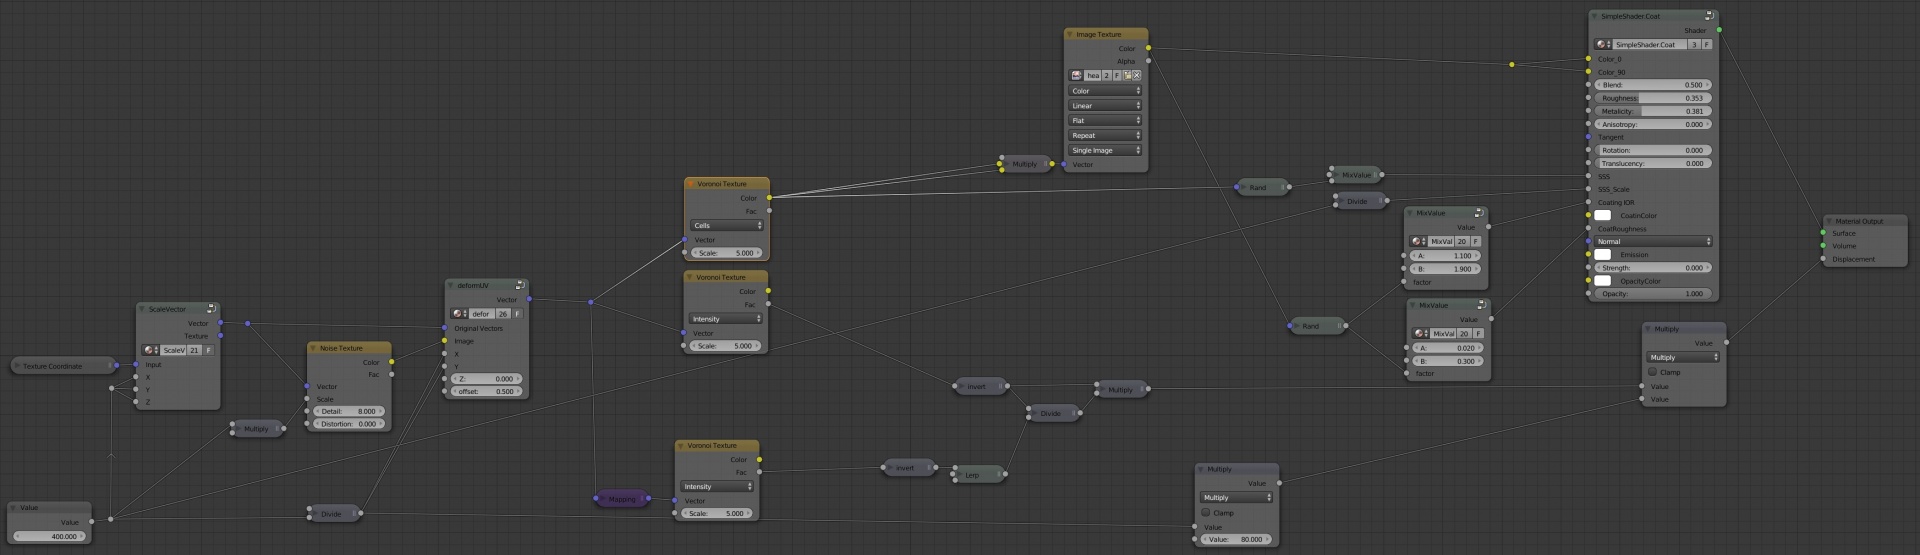
The node graph
The top right is’t just an uberShader I did years ago (I’ll explain it in another post one day I promise).
The main Idea is that sand look a lot like a voronoi but to give it more a faceted look I’ve find that dividing a voronoi by another of the same size do the trick, the second one is remapped with a black above zero to avoid extreme value in the result of the division.
in blender voronoi can output square distance between cells I think (intensity) or random somewhat light color,
So I decided to use this flat per cell random color as Uv coordinate on a sand photography, but it could have been a color ramp, it’s used as a palette. I use the second one from this page http://usseek.com/images/sand/2 any contrasted et varied sand picture can do the job.
The rest is pretty obvious, using the voronoi to feed some random generator to drive the sss scale, ior or roughness or a coating layer.
the BIG displacement is just a noise on the mesh itself.
As for the rendering it took 6 minutes with 4 gtx 970 at 1024 AA samples. building the BVH is a bit long because of the micro displacement.
The lighting is a just a sun with a high strength and an hdr, presumably from Greg Zaal.
Ah and yes I used filmic
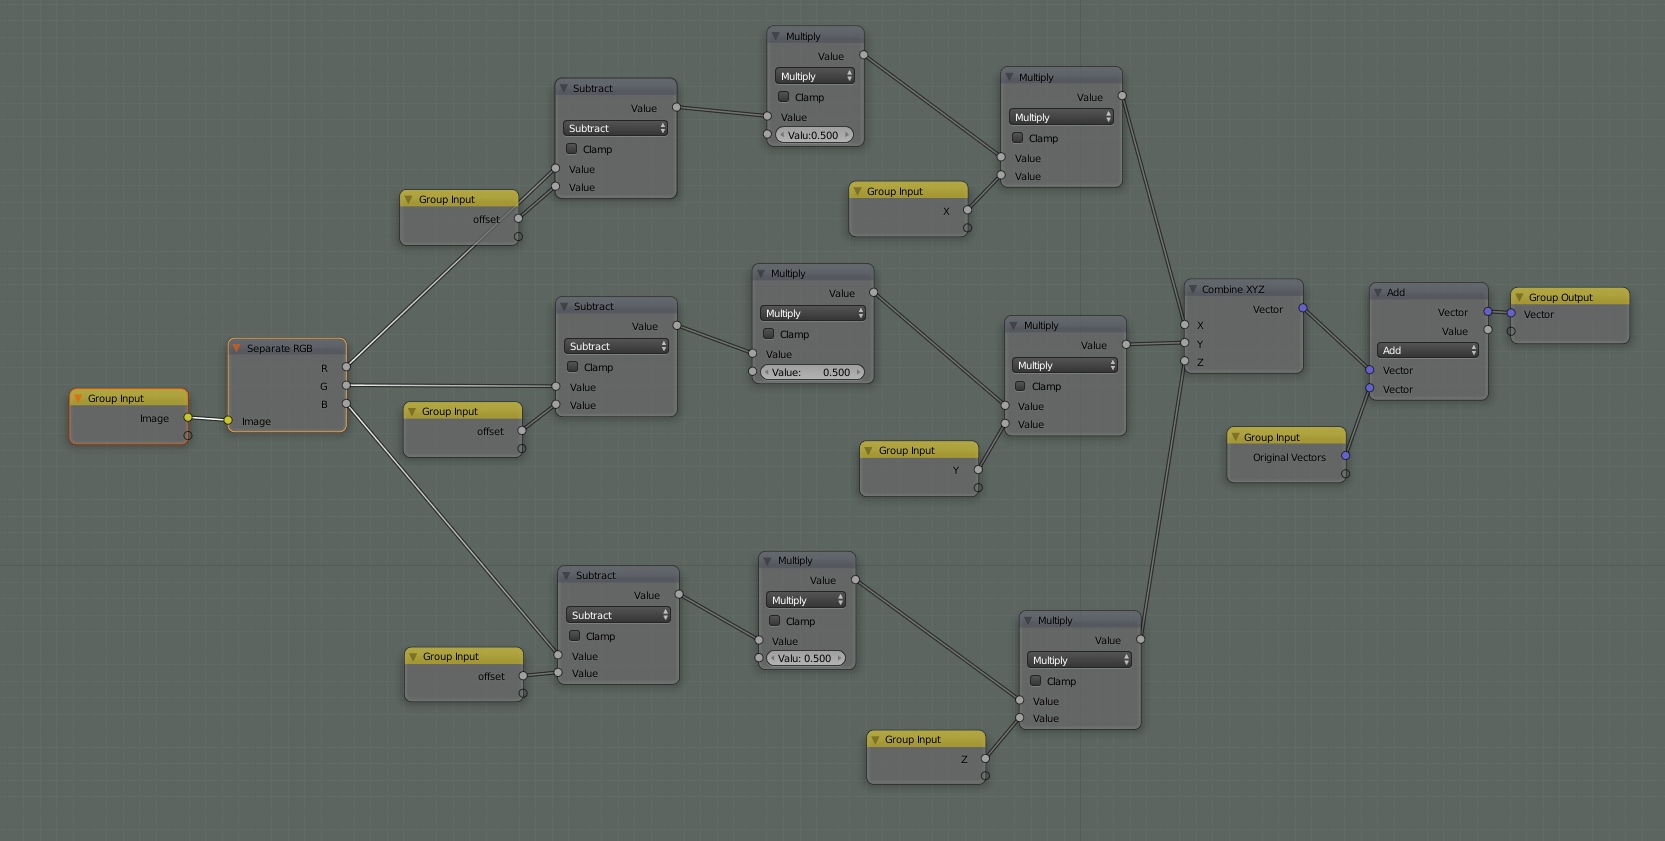
The Deform UV node:
is just the an Add UV+ a RGB texture normalized and multiplied by a number un XYZ or UVW
It’s purpose si to break the “pentagon” in the voronoi, to have more Chaos.
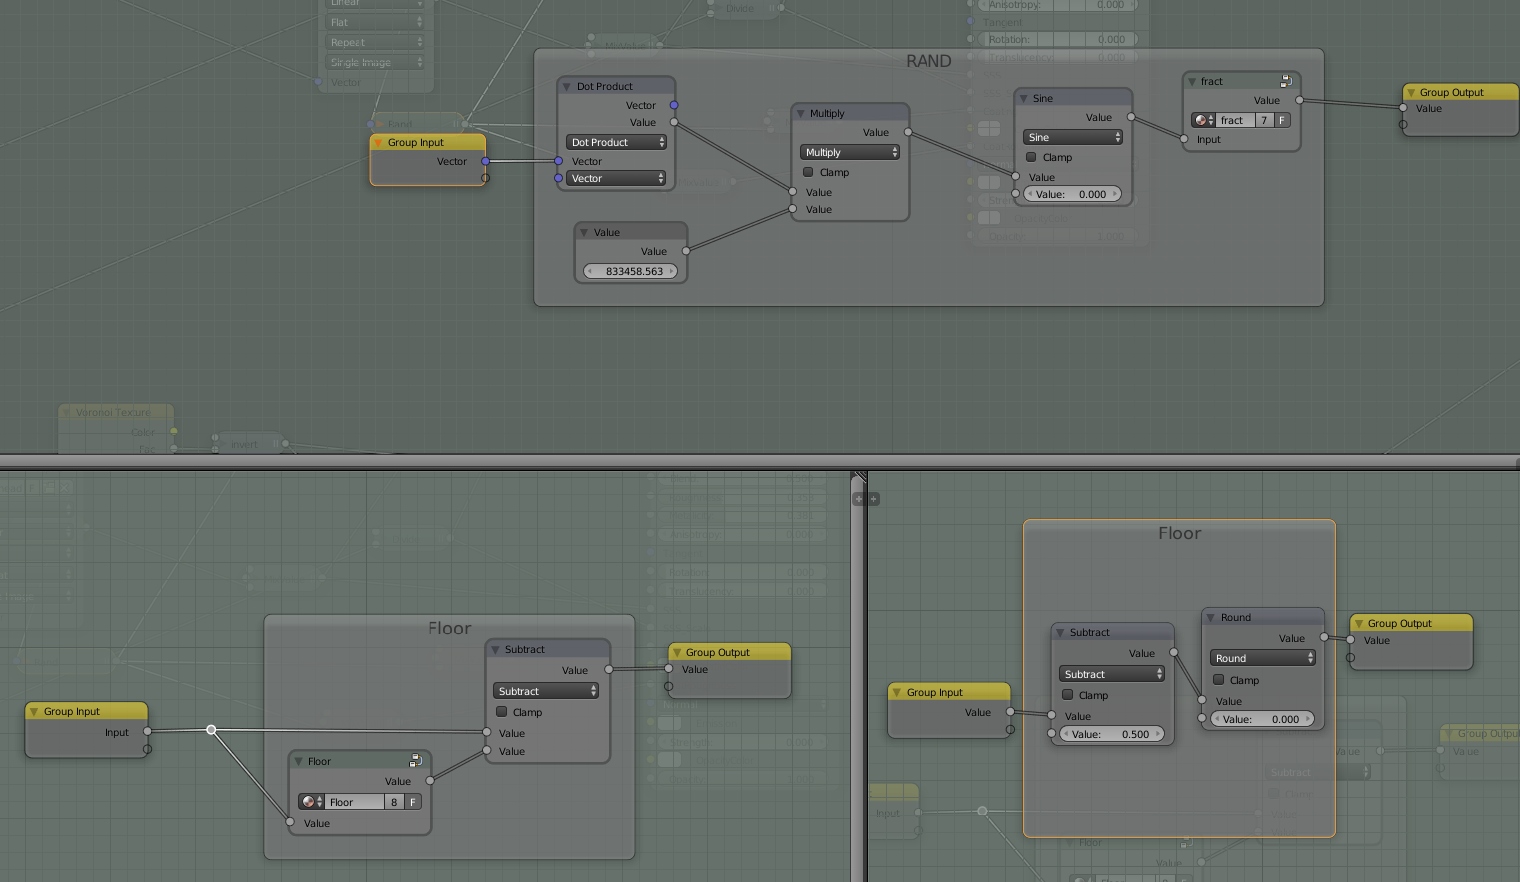
The random generator:
is inspired (copied) from the voronoise code of Íñigo Quílez on shadertoy :https://www.shadertoy.com/view/Xd23Dh
The code look like that

wich translate to that in cycles node:
The shader:
If you read it to the end you deserve it : THE BLEND FILE (shader only) you have to load a sand picture with the image texture node or accept PINK sand ![]()
That’s all for today, feel free to ask any question in the comments or give me some challenges as long as it’s procedural.
1 comments
This looks great. I will check it out as soon as I have time. I have been looking for a excellent sand shader setup.