
Fire Shader part one
Fire shader !
Before diving into the shader itself, let’s talk about UV or UVW.
UVW stand for XYZ but in texture space. it’s referenced by UV for image textures and Vector for other nodes.
Generated UV for a cube, from bellow:
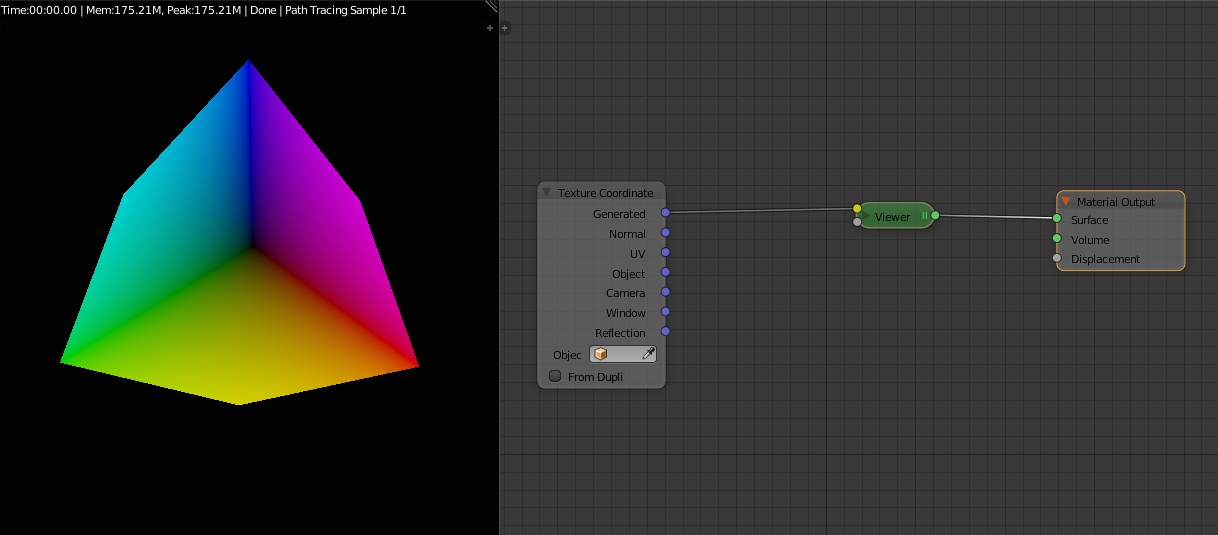
the point we see in the middle of the picture is black, it represent the origin of the UVW bounding box. It will be the default origin of all 3D textures
let’s try the gradient spherical (despite is written quadratic in the screenshot) :
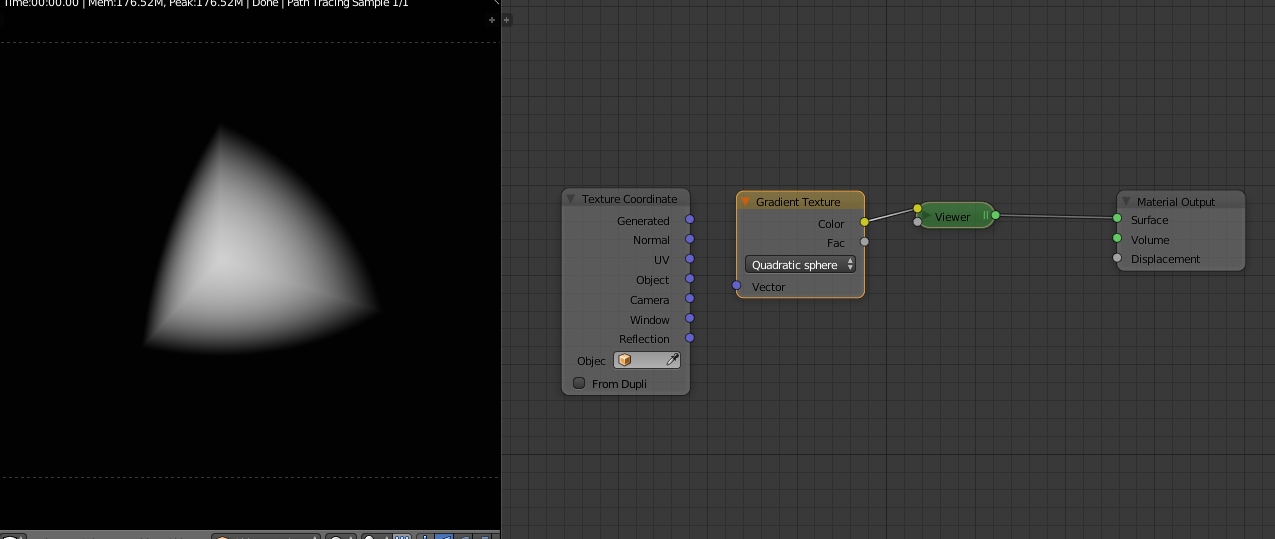
notice that the generated output is not plugged in the gradient texture but it’s the same as if it was, also, the center of the sphere is at the origin
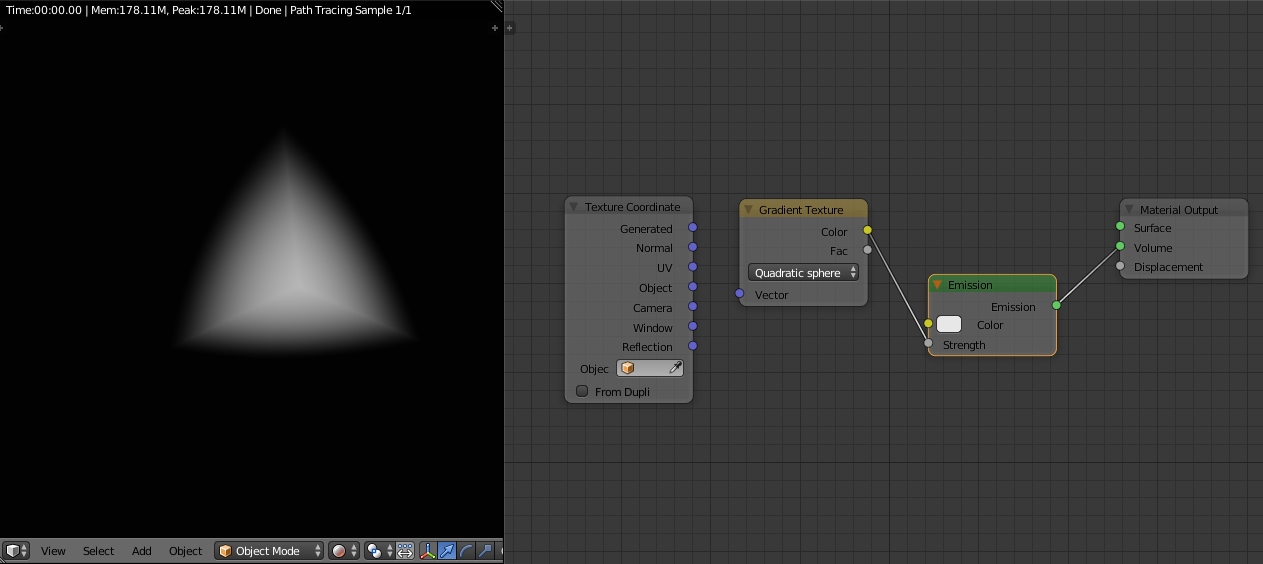
So guess waht, we already started the fire shader, after all fire is a ball of fire that emit light so I’ll create an emission shader and plug it into the material output volume and put nothing in the surface node and plug the gradient into the strength of the emit
there is no visual difference… until we turn around or we put something in it :
I’ve found that working with kelvin was a good and fast way to create the fire color, insteads of ramp, we’ll use a blackbody converter for that purpose.
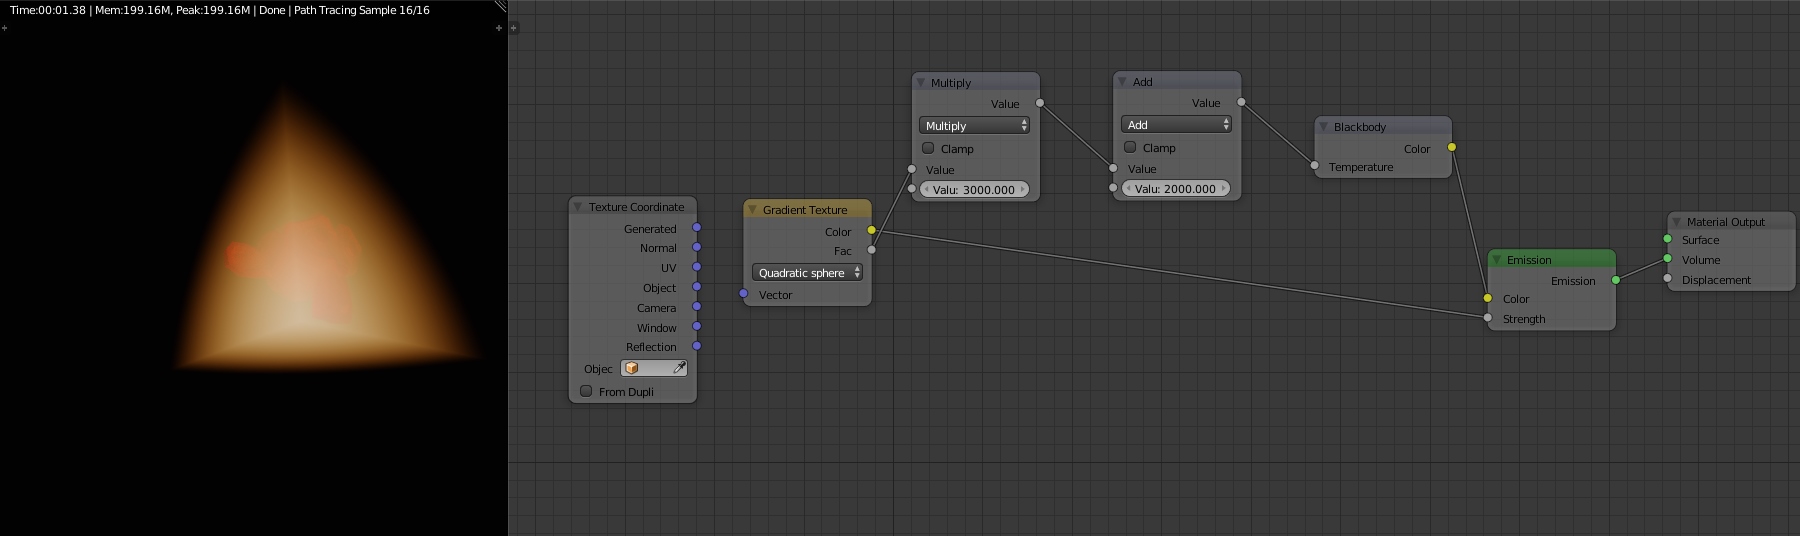
because our gradient output a value between 0 and 1 and because we (I) want the fire to go from 2000 to 4000 kelvin I multiply the gradient output by 2000 and add 2000
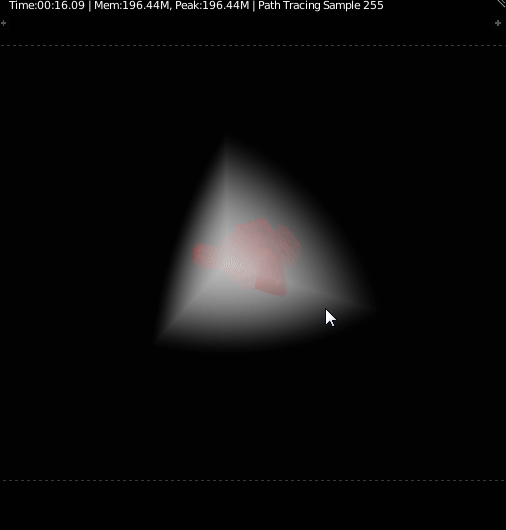
It’s already looking like fire and suzanne excepted it’s noise free even at 2 samples. :
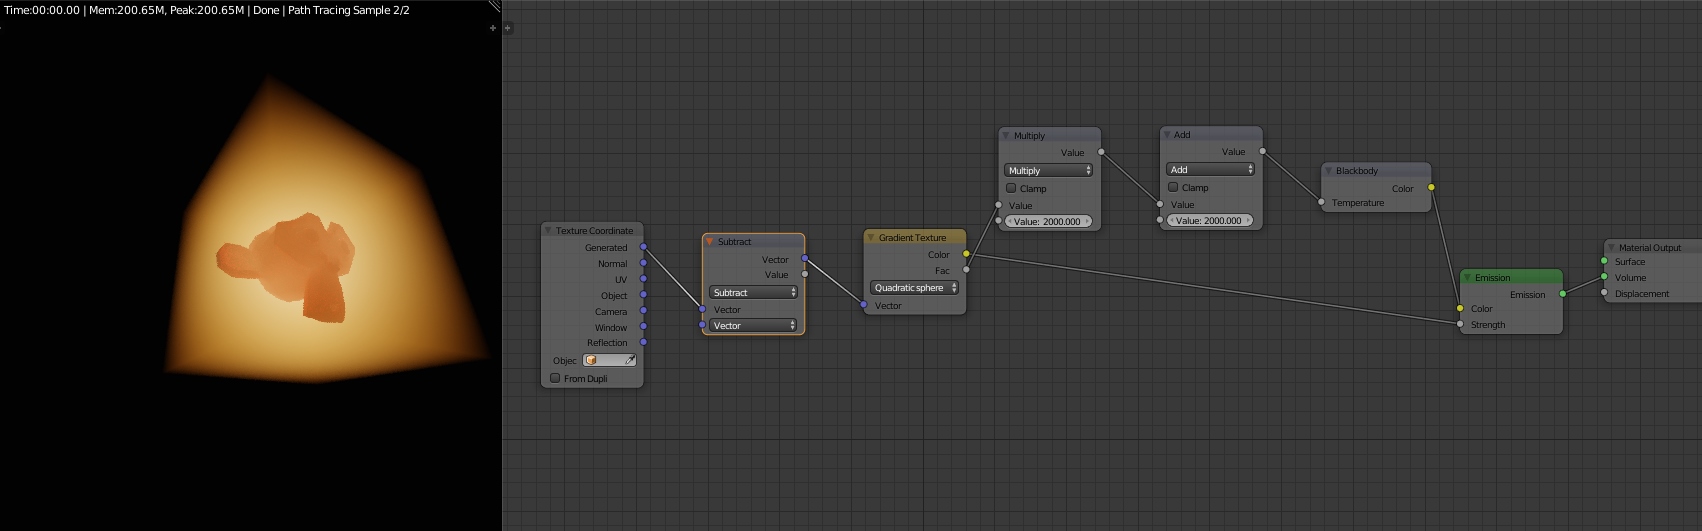
Fist problem, the fire is in the corner and we want the fireball to be at the center of the cube before deforming it, we need to move the origin, we’ll need finally to use the generated texture coordinate.
A bit of math, I’ll only talk about the X coordinate, it’s the same principle for the 3 axes
we want X :0.5 the center of the cube, to become 0.0, because gradient use 0 for origin so, 0=0.5-0.5 , easy
just plug the generated texture coordinate, into a vector math node in subtract mode to and because the default value for x,y and z in the vector node is 0.5, the job is done
Second problem, the radius of the sphere gradient is 1 so most of the sphere is outside the cube, because no matter the size of the cube its generated UVW goes from 0.0,0.0,0.0 to 1.0,1.0,1.0
let’s scale it with a custom node group, an easy one
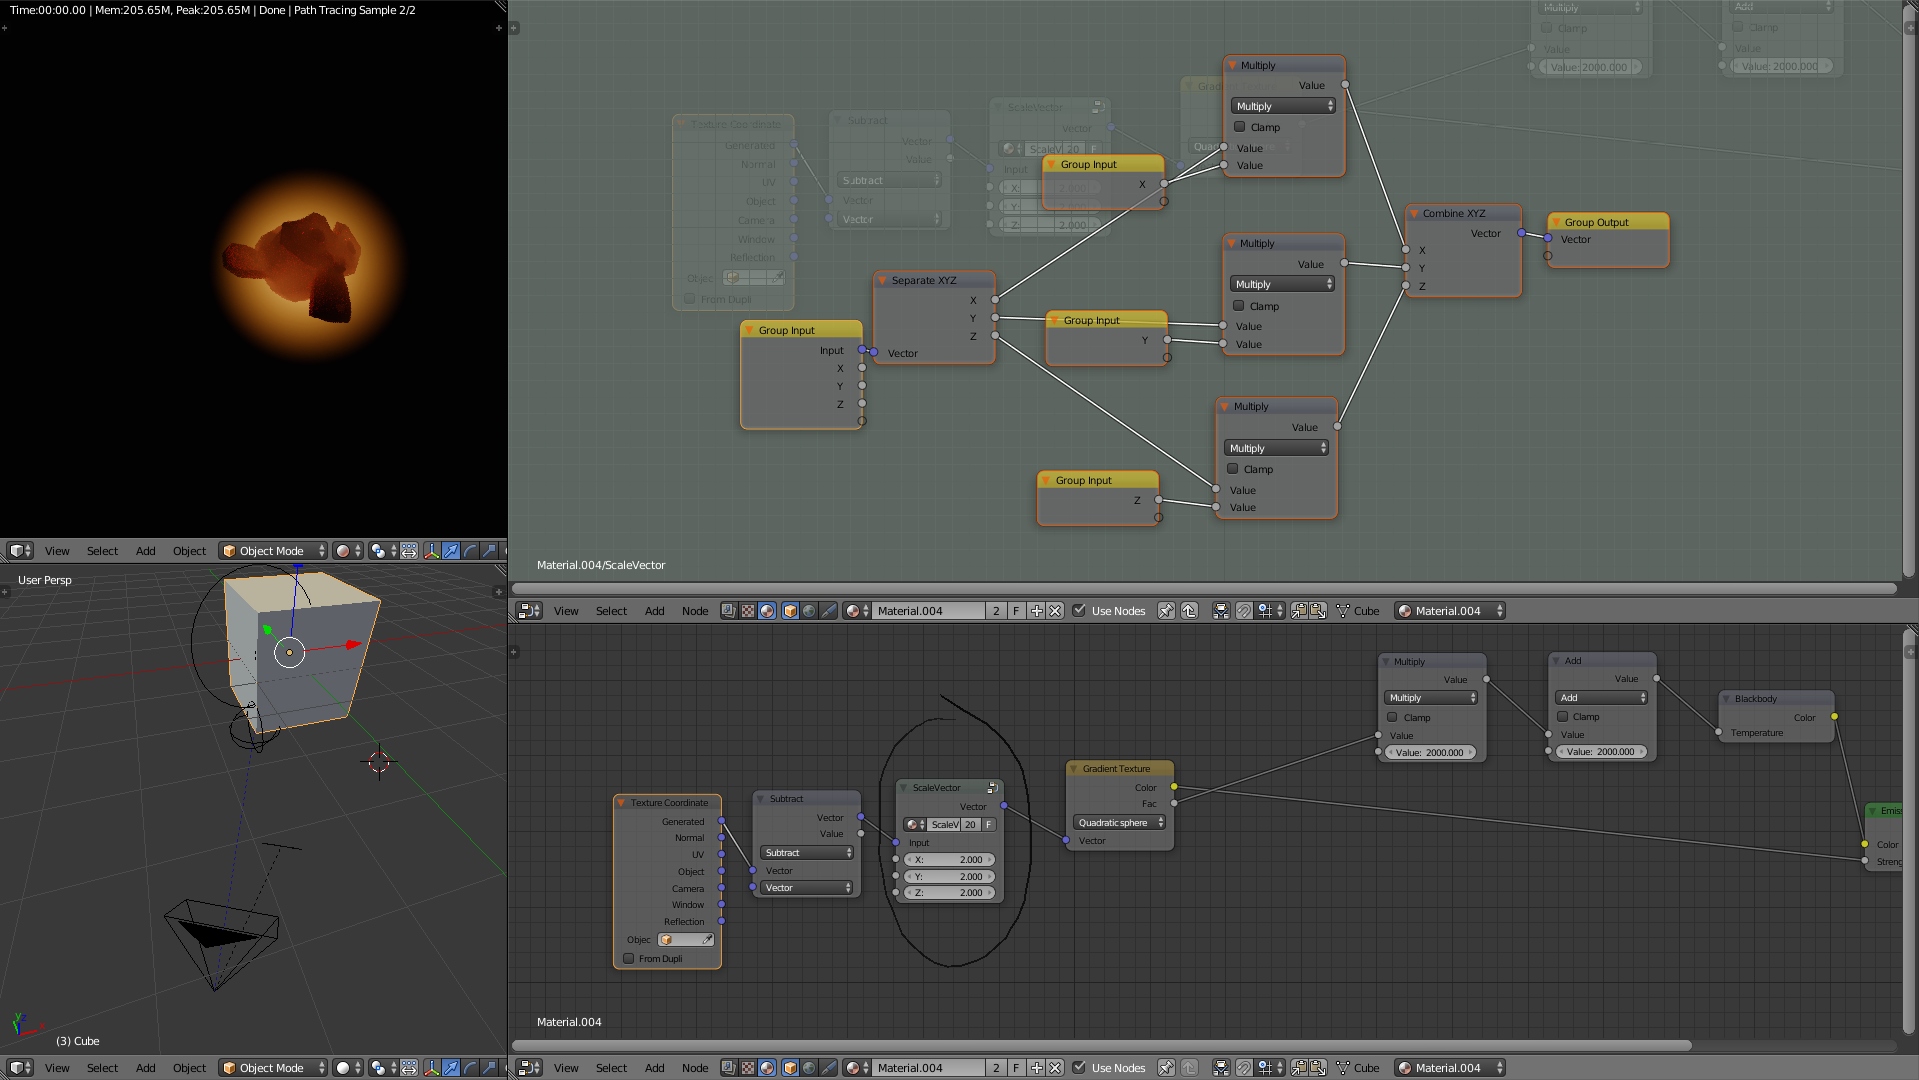
The principles is the same , still in x only, now that our origin is at the center of the cube, the border are at 0.5 and -0.5 and we want them to be 1.0 and -1.0 and 0.5*2=1 !
Note how I have duplicated the input node to make the graph more readable, for small nodes like this it’s not a problem but when you reach 50+ nodes (and you will) I can be a nightmare of spaghetti.
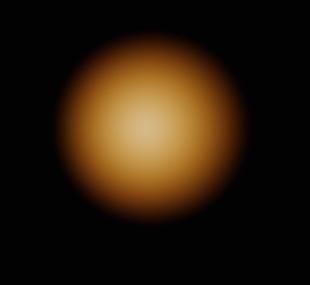
It looks even better without suzanne ![]()
before deforming UV, it’s a good Idea to make a nodegroup to save screen space , with fixes value hidden and others, “public” but before that we’ll add a multiplier for the strength of the emission node like that (grease pencil circle) :
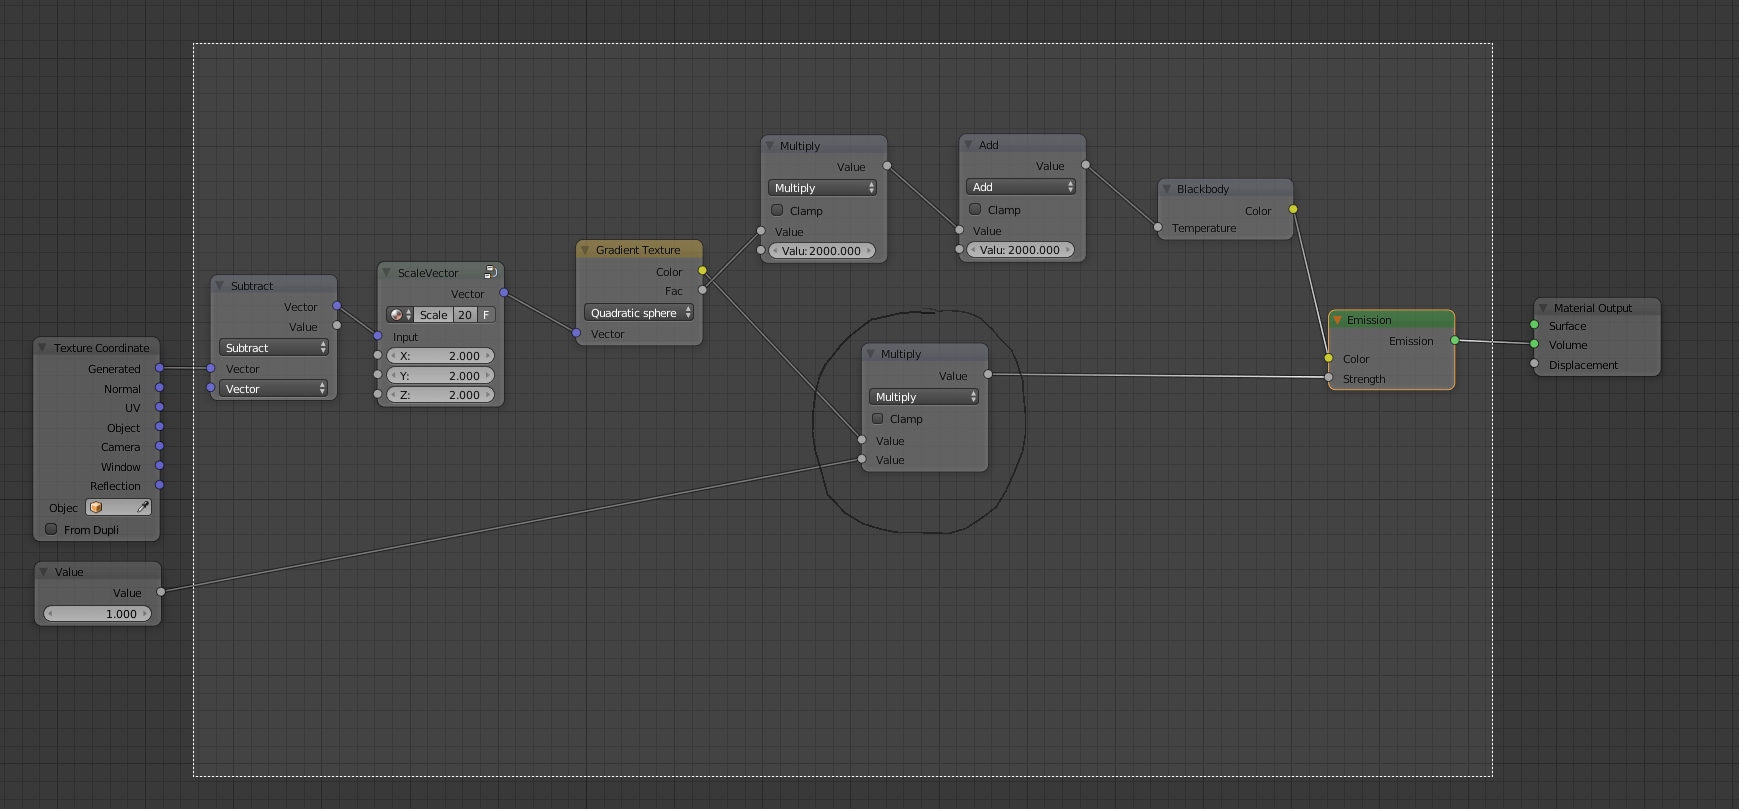
now select all nodes except the material output, the texture coordinate and the value use in the multiply and press ctrl+g, press tab to go outside the node group and you should have something like that:
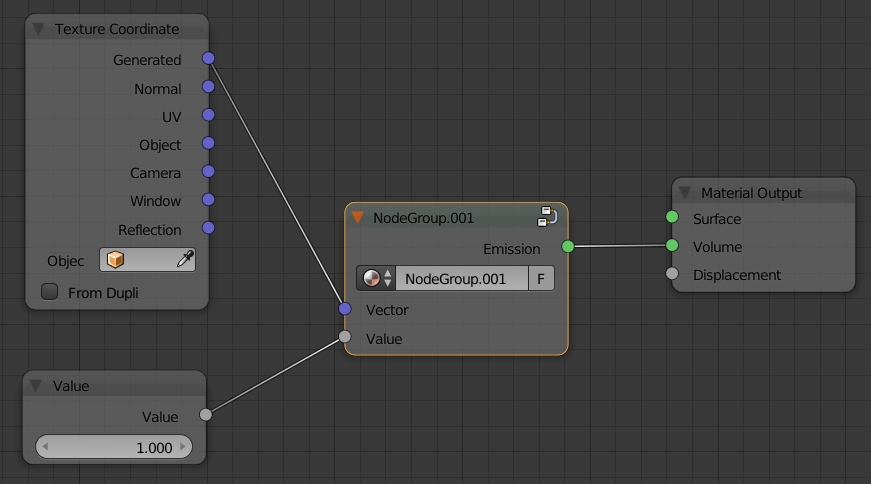
rename it flame and go inside by pressing tab again, we forget something .. to make the color temperature value public, with a bit of simple math we add the minimum temperature to the difference between the maximum and the minimum, multiplied by the factor output of the gradient. once again, for readability, duplicate the inputs and RENAME your slots
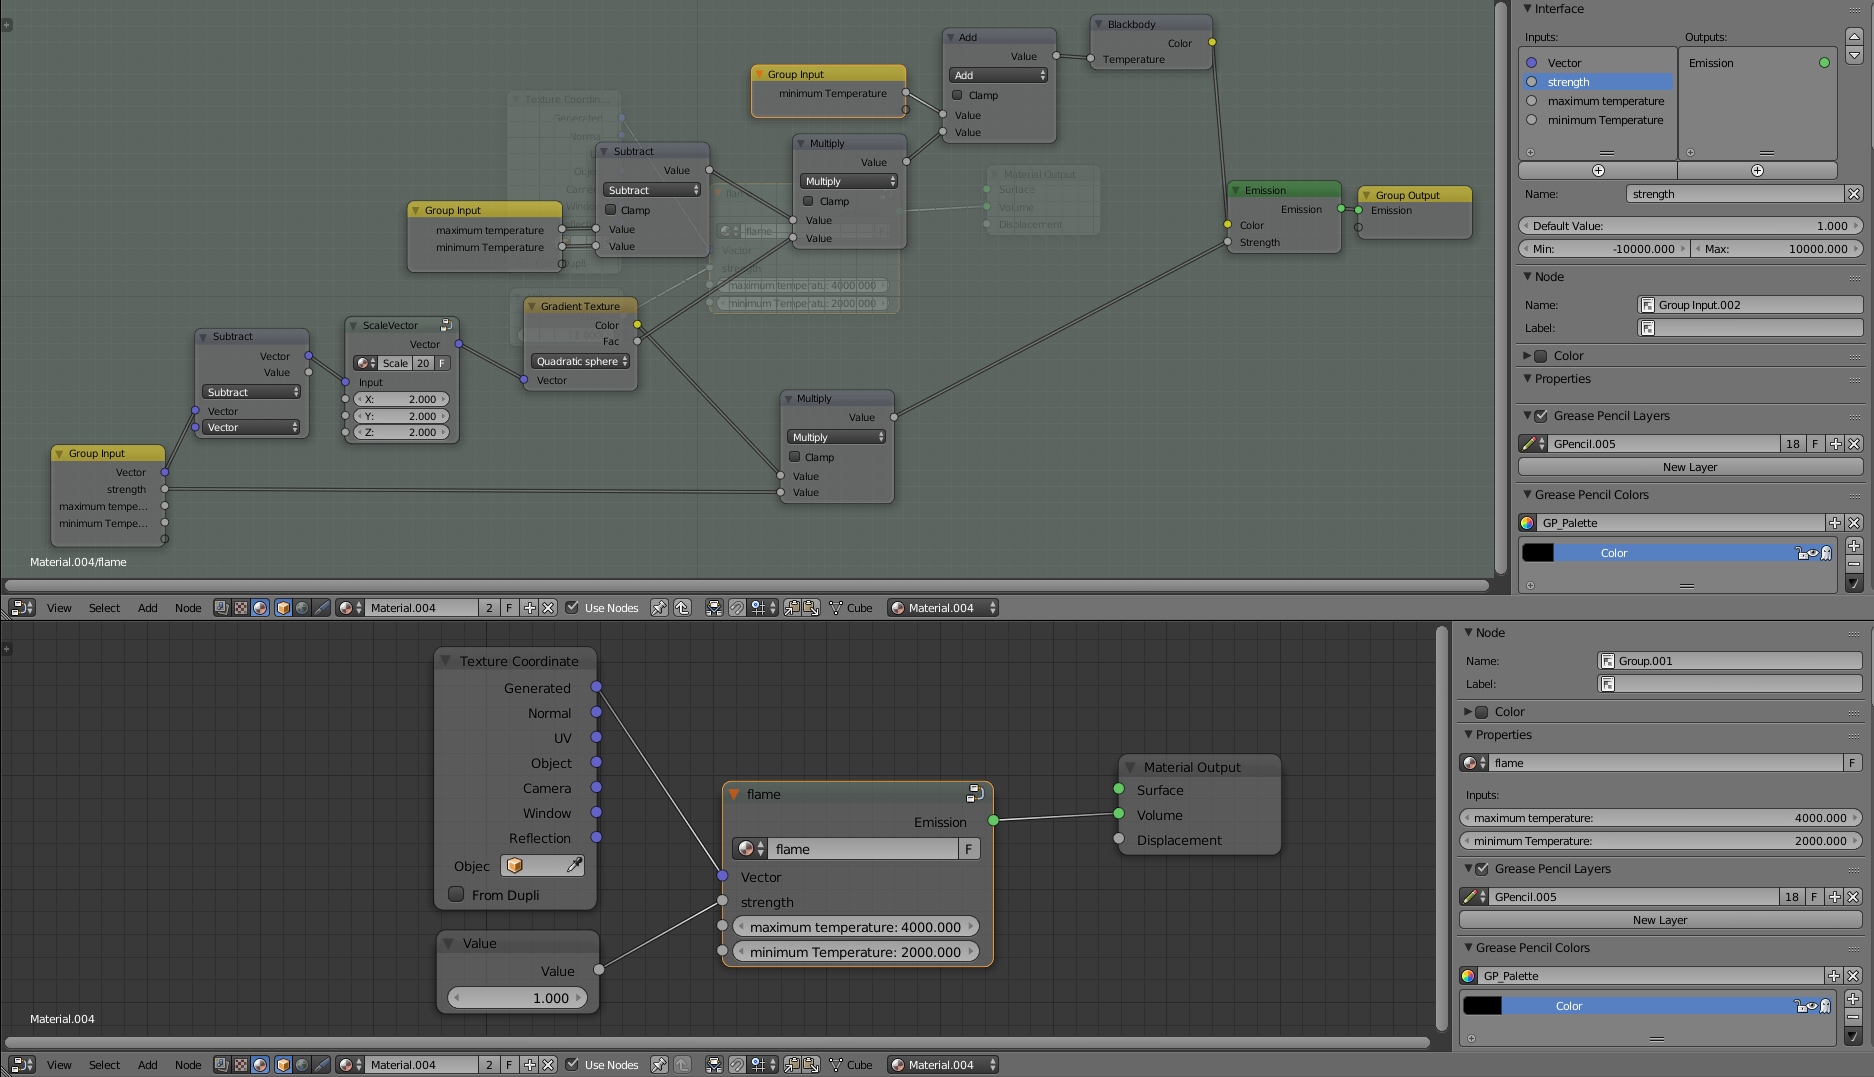
The good things is that if you press the little F on the node near the node name and you save you statup scene now, You will never have to redo that thing again. The bad news it that it’s only the part one of the tutorial.
Questions, typo, suggestions, whatever, feel free to use the comments
1 comments
very innovative approach…..kudos!