How to render Interior A LOT faster with Cycles
OUTDATED DO NOT READ OR DOWNLOAD THE FILE, NEW VERSION INCOMING
Short answer : bake the primary bounce
Cycles is an unbiased engine, this means that a ray will bounce until it touch a light or reached the limit you set un the render parameters.
But cycles possess a completely open shader system and we will see that it is possible to help it with the noise and rendertime by storing the light in a texture. This is not the traditionnal baking approch, shadows will still be true shadows, reflection will be exact, this thechnique is almost unoticable in the final render.
The main idea is to calculate the scattered light received by the object and then use it to illuminate the scene , not to use it directly which would require really high resolution map that would take a lot more time than to render a picture or give a pixelated aspect lighting if the resolution is too low.
To re-do the shading of a scene is tedious, which is why I recommend starting your scene with the shader that we will build together
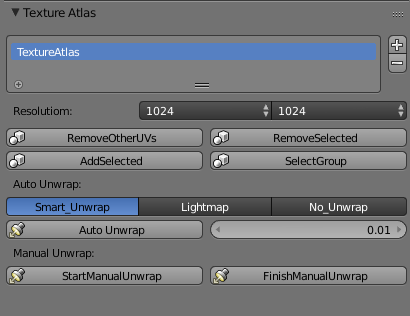
First all objects (at least the ones contributing greatly to the lighting) must share an additional UVmap, there is an add-on in blender by default that we just need to activate: Texture Atlas

Once activated it is in the render setting panel, at the bottom.
Just click the little “plus” icon to create a new UVmap
It is on this UVmap that we will “bake” light.

Typically for this scene, I only took the white surface, the walls, the table and wood objects. But we could take everything.
Thanks for chocofur for letting me use this scene.
Now the shader.
In all my scene am using what some call an uber shader. link below to mine inspired by disney principled BSRDF
https://disney-animation.s3.amazonaws.com/library/s2012_pbs_disney_brdf_notes_v2.pdf
It looks like this
|
|
Nothing fancy at first sight, The idea is to be able to render any non-transparent material with as few settings as possible . By default it equals an ordinary diffuse shader It is physically plausible and I won’t talk about it much, just know that it can render Z-Depth, potion passes and colored ID pass aka wirecolor. But more importantly it works seamlessly with the add-on I’ve written for this tutorial |
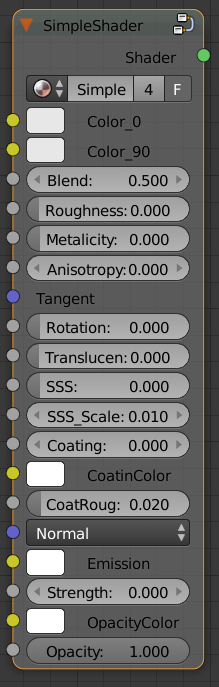
It can do all that, and it can do it without sacrificing to much on performance (3% compared to a single diffuse node for example). Thanks to Cycles smart branching.
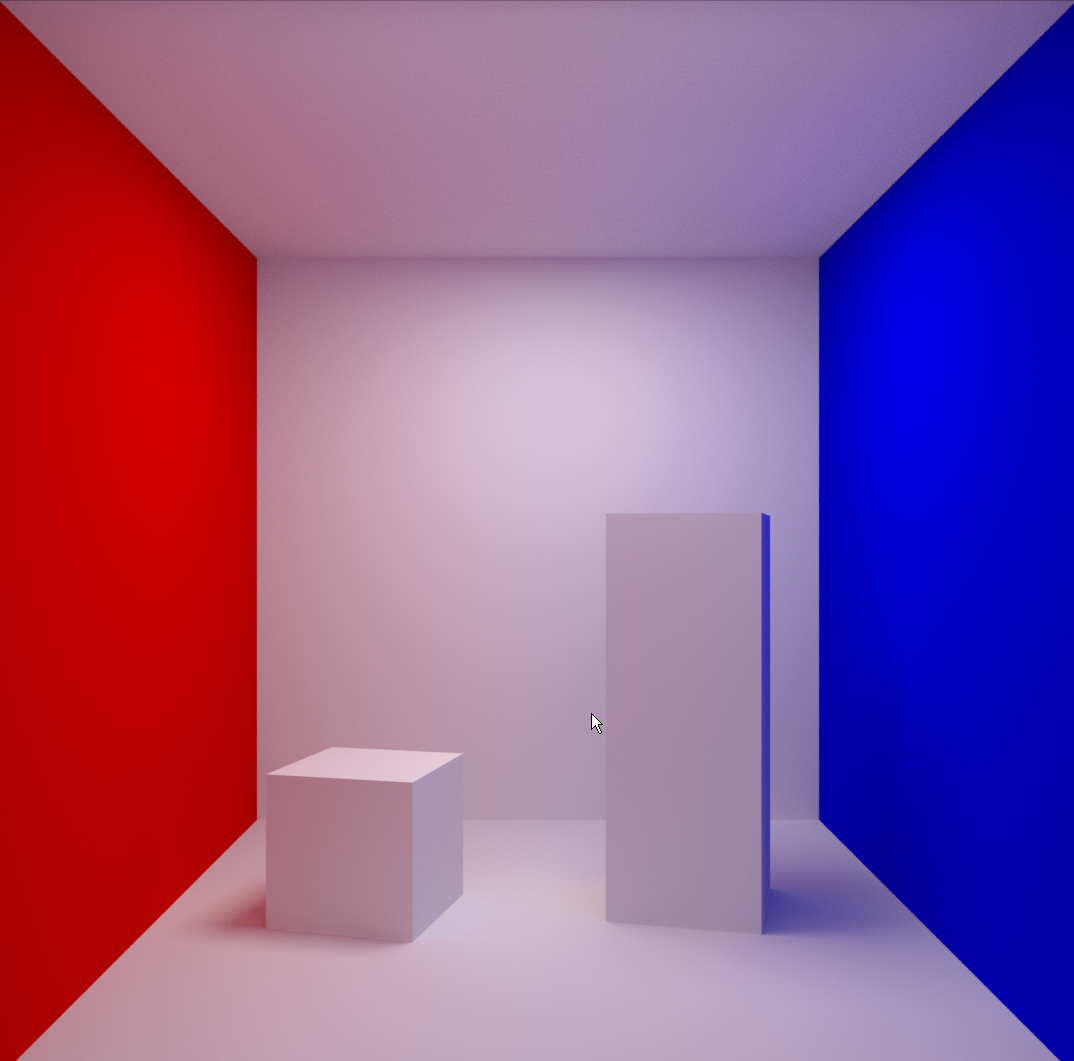
But for the sake off the tutorial we will not use it and build a simpler one from scratch. In a simple test scene , The Cornel Box. And I won’t even have to give you the scene file
Just add the default cube, two smaller one and an area light
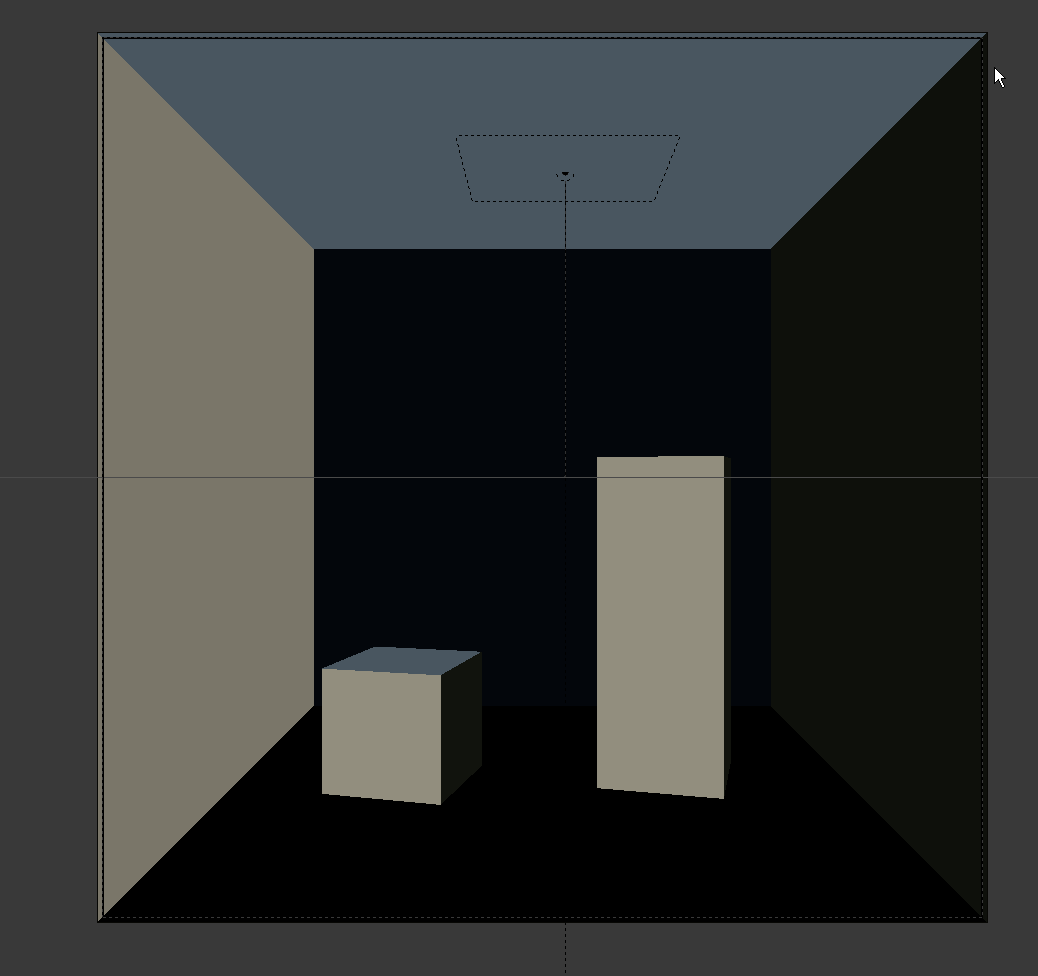
We will start by assigning a new material to the big box, we name it White.
As the camera is out of this box, we reverse its normal and we will use the geometry / Backfacing so the faces are transparent from the outside. Like this
.
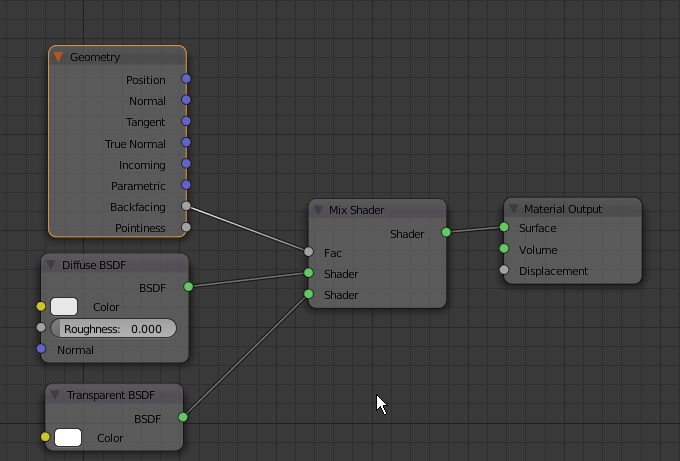
We will duplicate our White shader twice to create RED and Blue and assign them to the side of our box to complete the cornel box, this jewel of modern computer graphics
Just add an area light at the top
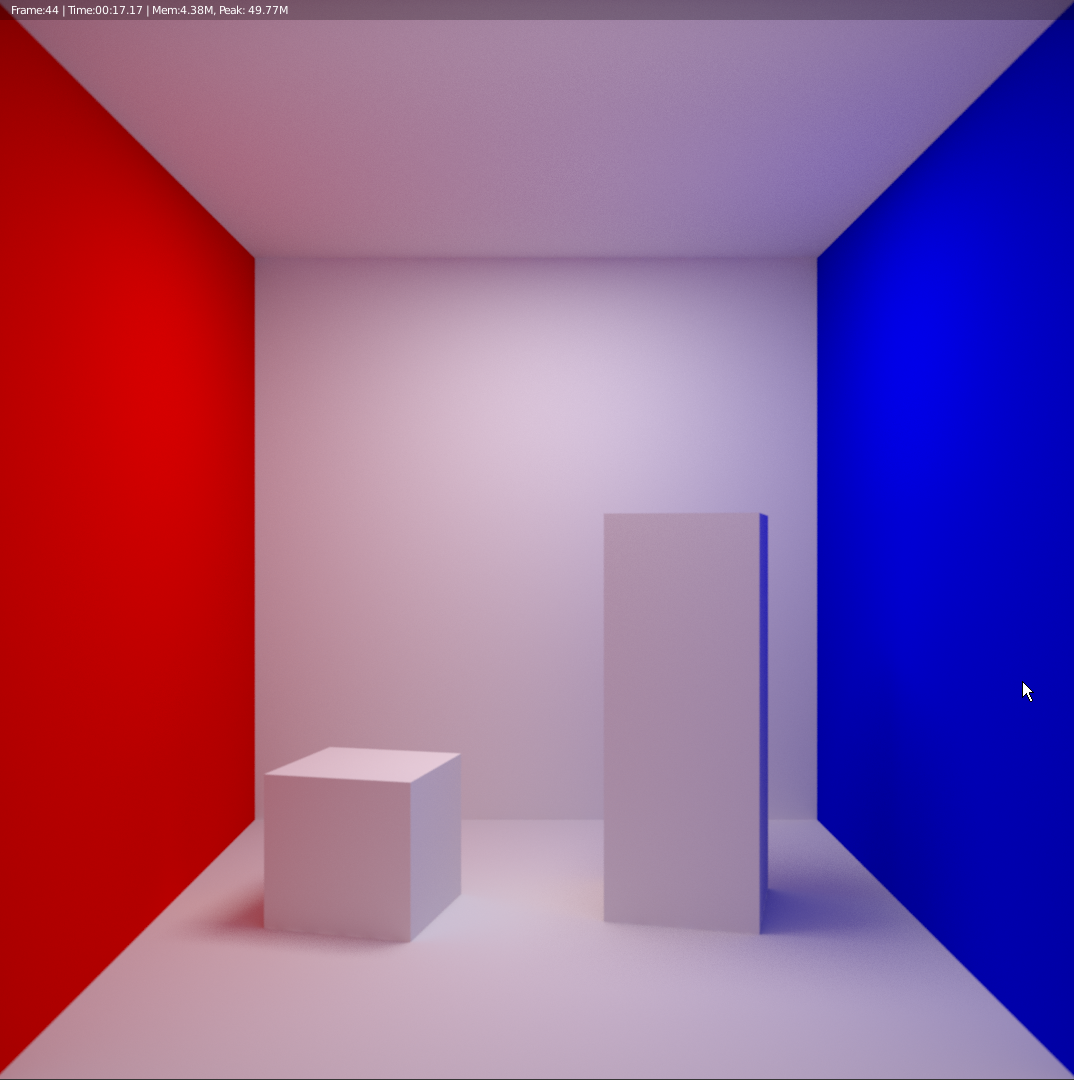
Taddaa !! :
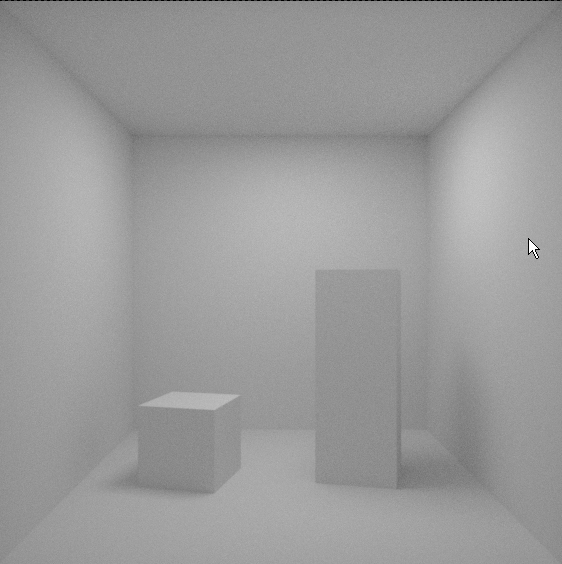
After rendering and waiting 40 seconds it gives this result from 8 bounces 256 samples
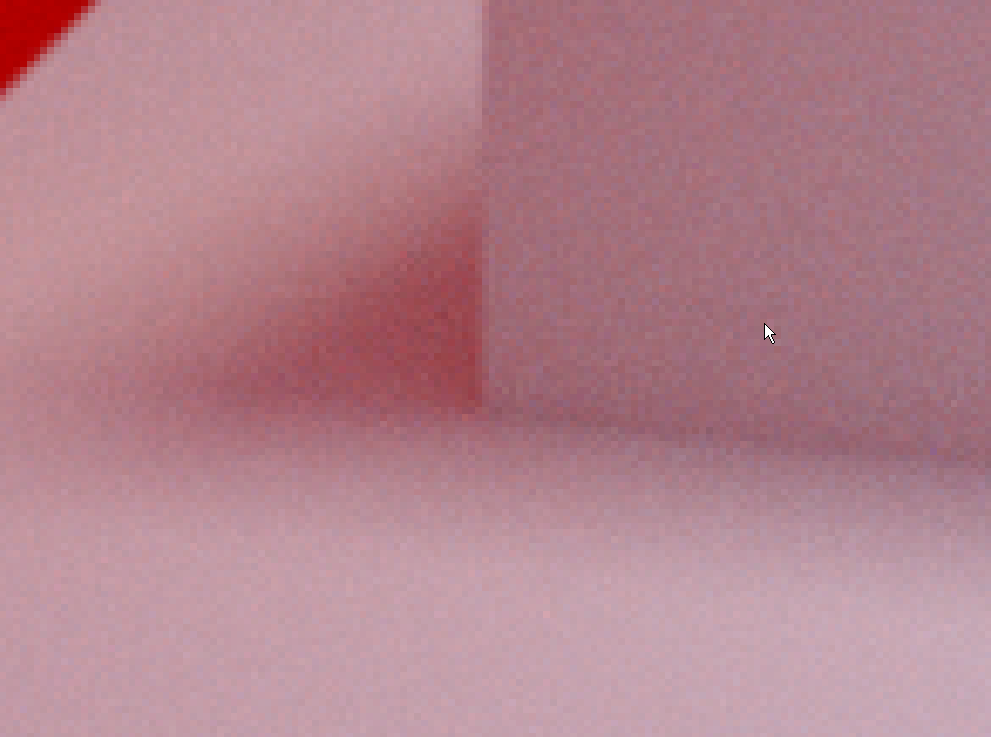
With THIS noise:

Why is there noise? Simply, each ray will bounce 8 times, and 8 times is a lot for each pixel (1080pixel 1080pixel * 256 ray * 8 bounces ) before hitting the area light (it’s actually a bit less, rays have a chance to hit the area light at first bounce).
How can we help? simply save the light in a texture
Before building our shader, assign the shader White to the two small boxes, now after selecting the three boxes, click add selected to “start in Manual Unwarp” in the Texture Atlas add-on Your object become one and are in a group called Texture Atlas
Go into edit mode and then select all the faces and press U on the keyboard / smart UV project, the default value work well. It is important to have a small margin between the UV islands, to avoid “light leaks”
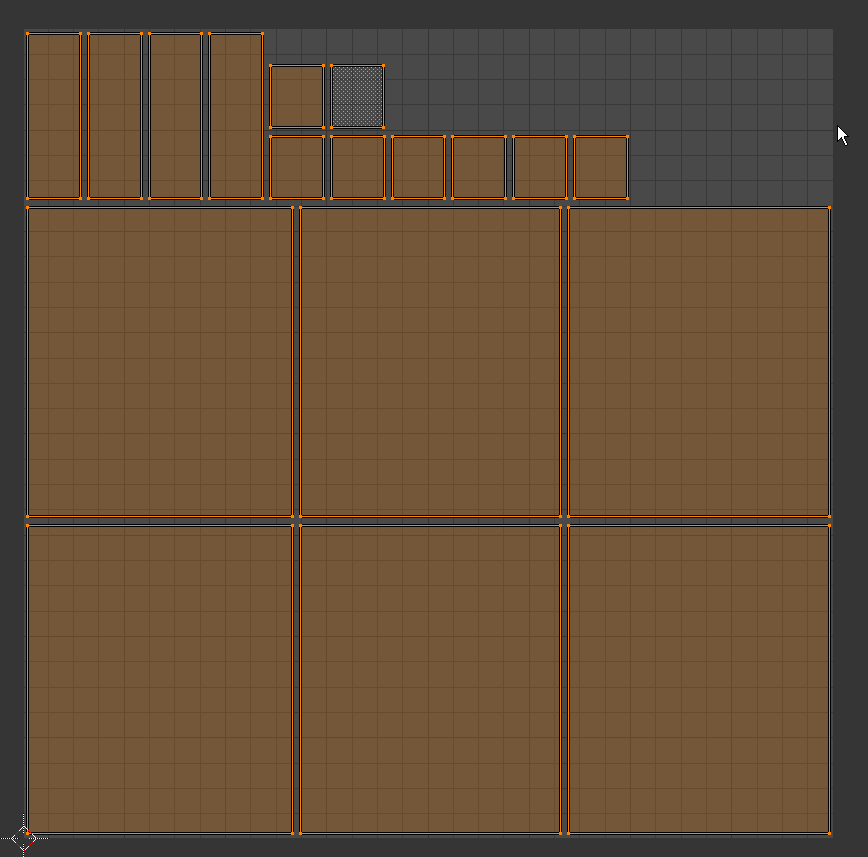
When you are satisfied, leave the edit mode and click Finish Manual Unwarp.
It is time to bake our light
Start by creating a new texture in the image editor for the Cornel box 512 * 512 should be sufficient but the following render uses a 256*256 pixels texture to highlight the eventual problems
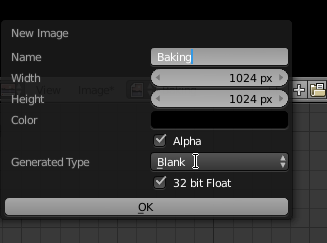
It is important if you’re going to have washed out area in your baking to check the “32 bit float” option
Then it’s pretty simple, add a node texture image in all your shader that points to your newly created texture
In the rendering settings panel, bake section, select combined, check diffuse (we could check subsurface and emit if needed)
Reduce rendering parameter to 30 samples, select your 3 boxes and click bake.
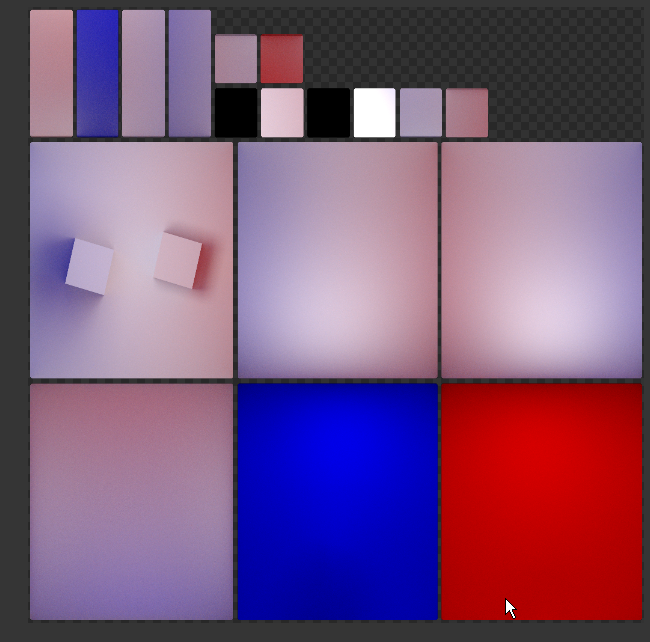
This should give something like this in the image editor.
This is the diffuse of objects, or, the light that they re-emit ![]()
On my machine, 256 * 256 image has put three seconds to go but if we try to use it directly really is not clean
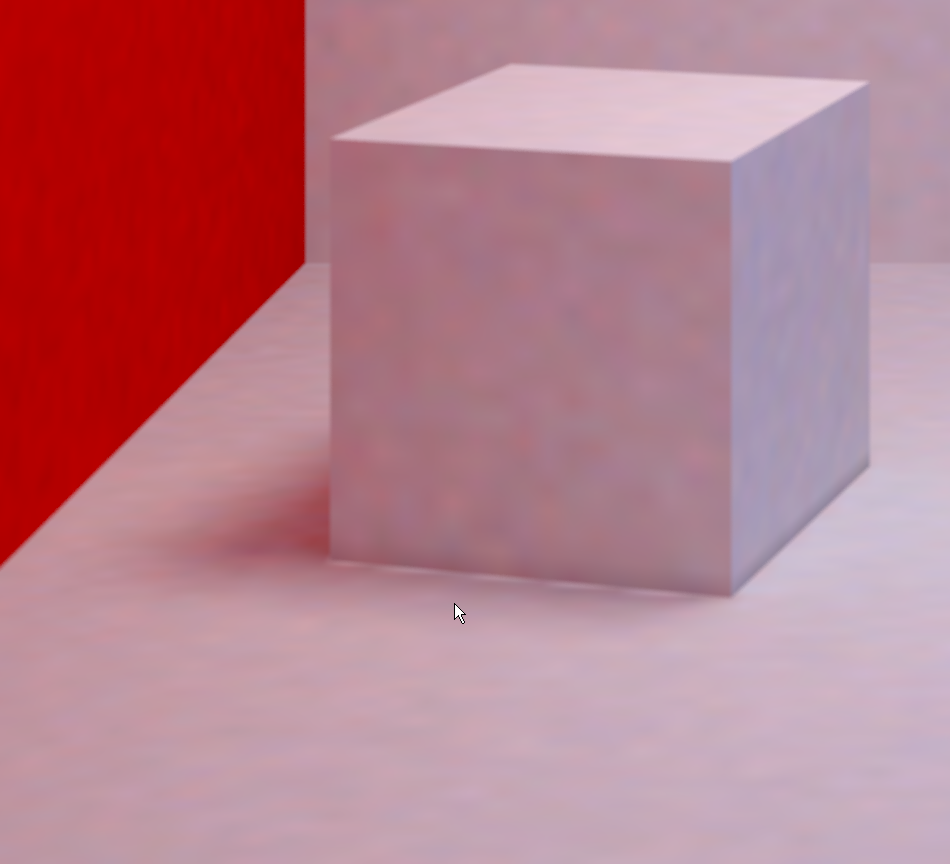
This is normal! We do not want to use it like that but instead use it only after the first bounce, and thus win 7 bounces in our case
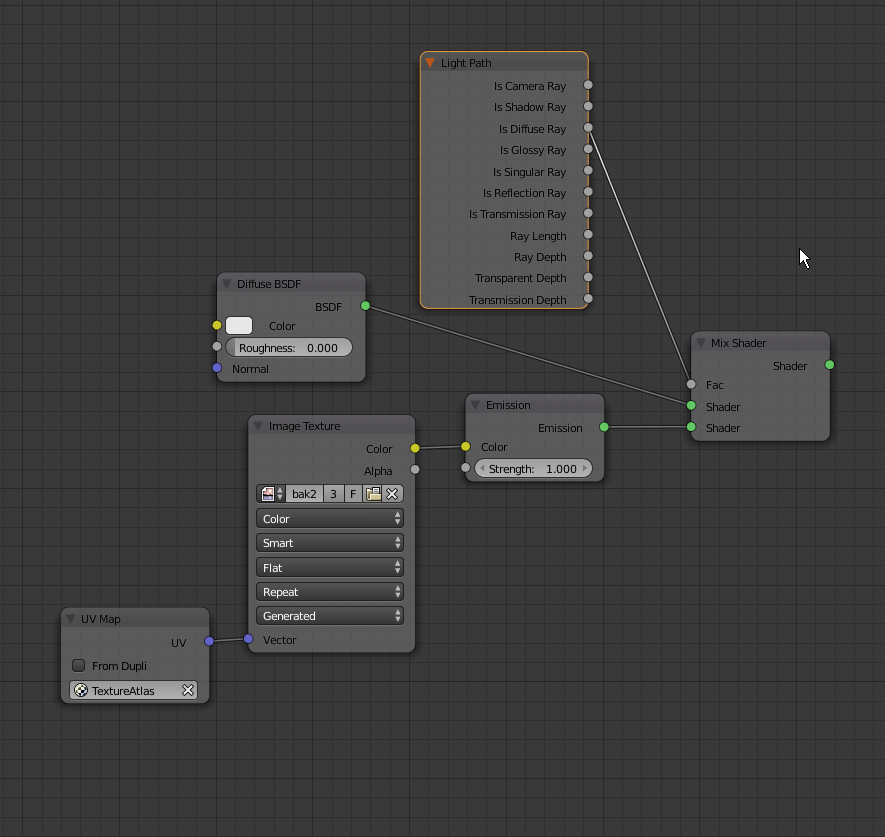
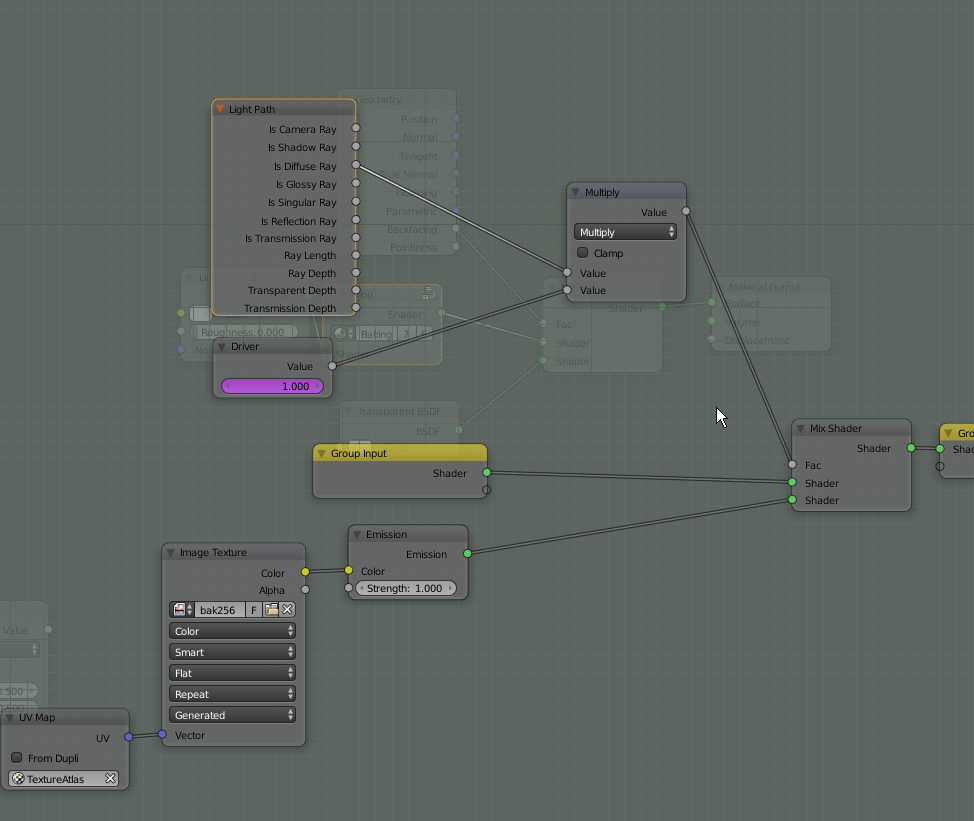
Cycles treats diffuse rays, glossy rays and so on separately …
To summarize, we will have Cycles stop doing diffuse bounces by using a light path node to use the map when it detects a diffuse ray.
You can also save time by making a node group and go update the RED and Blue material (here it was the white), and as the condition and Bake map will not change, they are included in the group

Which gives This. Do not be afraid to make groups, often,It’s like commenting your code, Six months from now you will thank yourself even more if you have named them well .
It remains for me to add the group I call baking in red and blue.
It’s time to start rendering.
First 256 samples
First we note that with the same number of samples rendering decreased from 40 seconds to 17
let’s see the noise:
Before
After
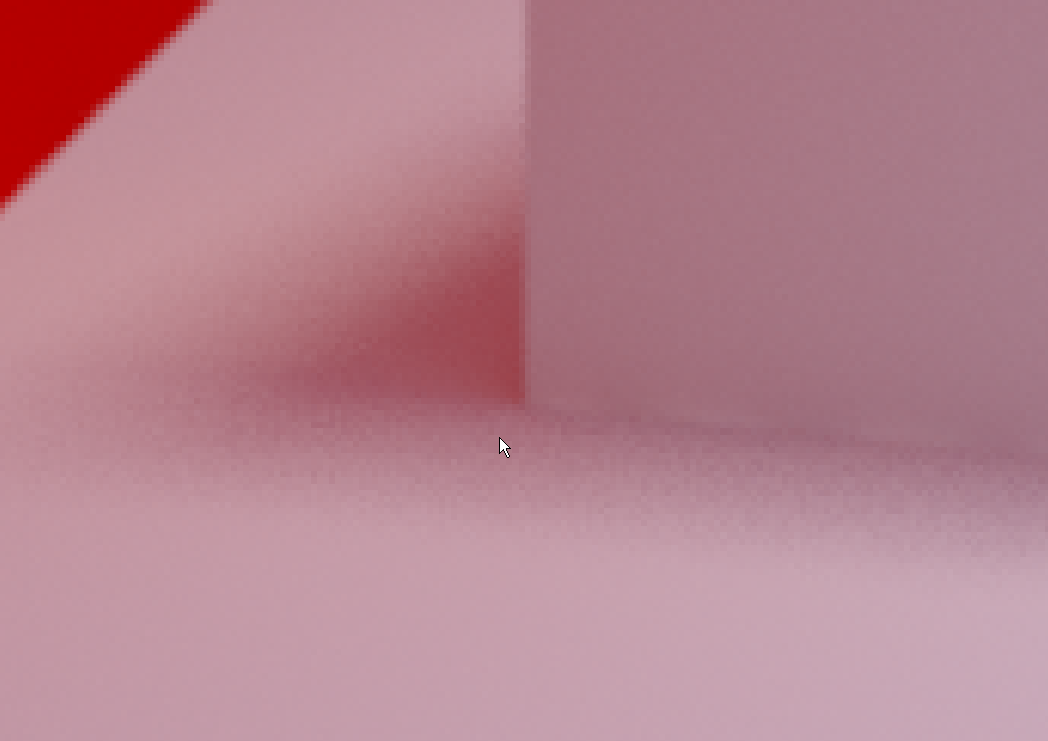
With the same parameters noise is much lower except on the direct shadow from arealight, it’s quite normal. We also see that there is little light leakage on the cube edge, this is probably due to the resolution of the map or the margin used in the smart unwrap. You will have to find a good value depending on your scene
But best of all we came from 40 to 17 seconds, can’t we improve the shadow and probably also reduce the time taken even more? how? By increasing the number of samples of the light which is only possible with BPT.
Start by choosing Branched Path Tracing in the sampling settings of the render panel.
We will go with 32 AA samples
It’s a bit worse than the previous rendering but also much faster (four seconds on my computer for the entire image).
First we take care of the grain on the diffuse, choosing 8 for Diffuse sample

We then take care of the shadow noise by setting the samples of the arealight to 4

It’s not bad,we could even push the diffuse samples higher but this is the result in 8 seconds, it’s going very well .
Is it finished ? Can I go play a Overwatch now? Not quite ..
We still need to create a driver to control whether or not the baked map is used. Useful when we want to redo the baking without modifying all the shaders one by one.
It’s up to you, to control my “global” variable, I create a text object that I parent to my camera, so that it is always at hand and I add a custom property to it.
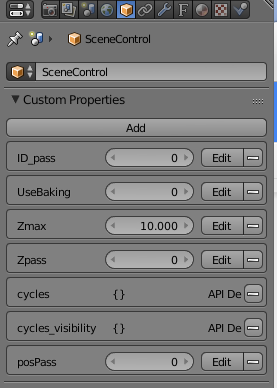
In this panel, click on add:
It will be called UseBaking
Default 0 (not 0.00, to prevent it to be a float number)
Min 0
Max 1
Then create a driver in the shaderGroup.
And set it in the graph Editor “n” panel.
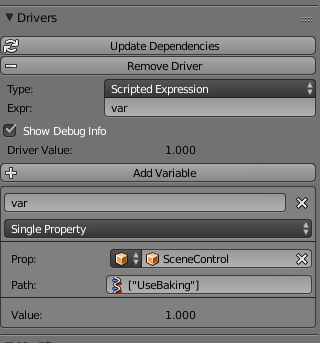
This is done now. Note that if your subject moves, nothing prevents you from doing an animated bake (untested)
The advantages of this technique:
The camera and the small objects that do not touch the others and thus can affect the GI may move
Rendering speed:
The reflection and refraction are also accelerated, in fact the rays often end up landing on a diffuse surface
disadvantages
Although it’s quick we must redo the baking when the scene changes, (I’m thinking about an add-on that would deal with that for us)
You have to make all UVs for whole scene or at least the majority of the visible objects. For a closed room it works but for outdoor or scene with lot of instances that is problematic.
A solution could be to Bake the light in a smoke domain but after talking with the developers it is not possible even in the near future.
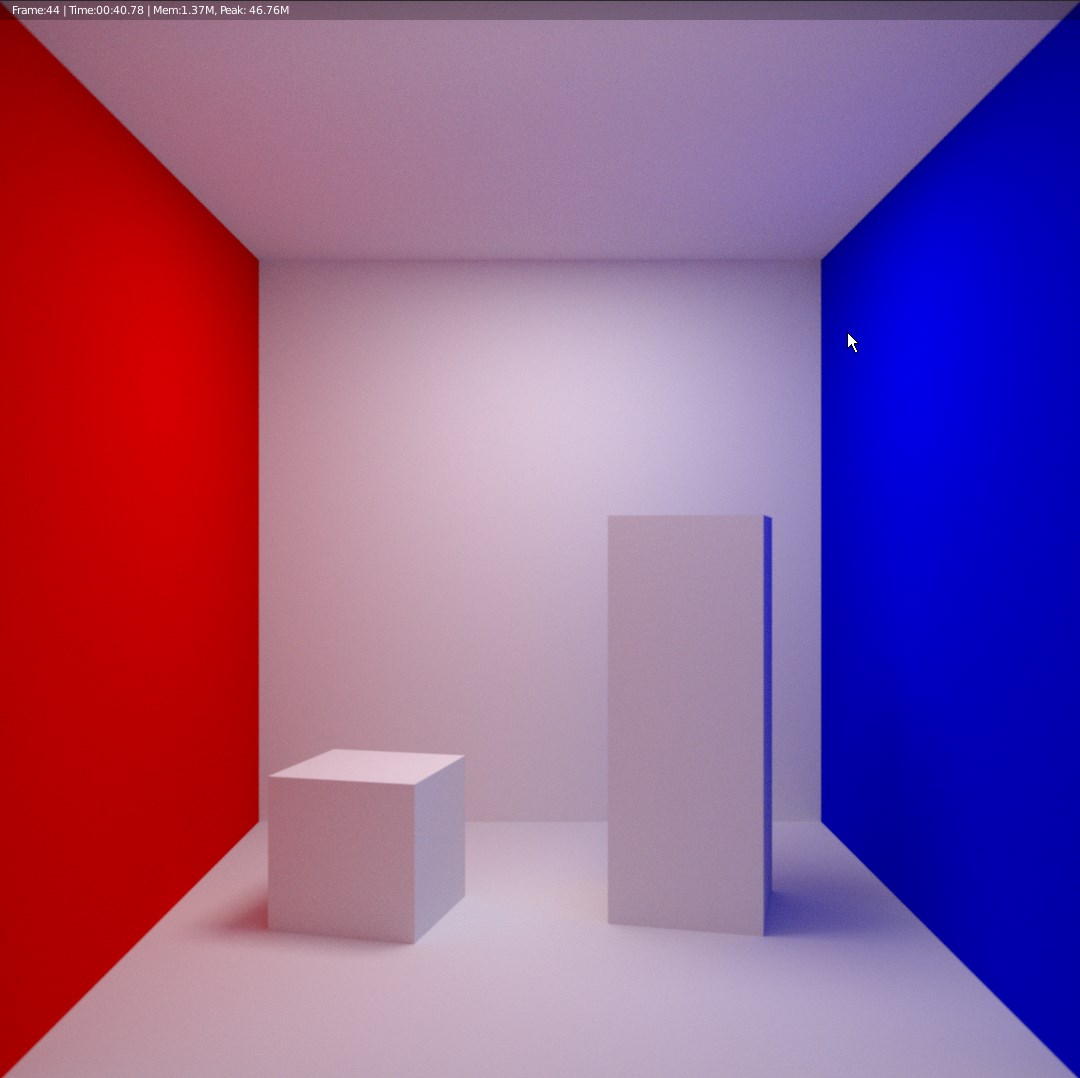
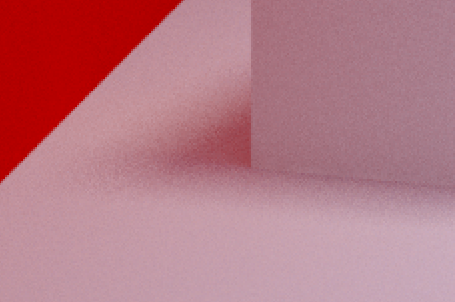
To convince you of utility.
This video was made in 1080 * 1080 with one machine in 48 minutes (one minute per frame), the baking took about 15 seconds, only once
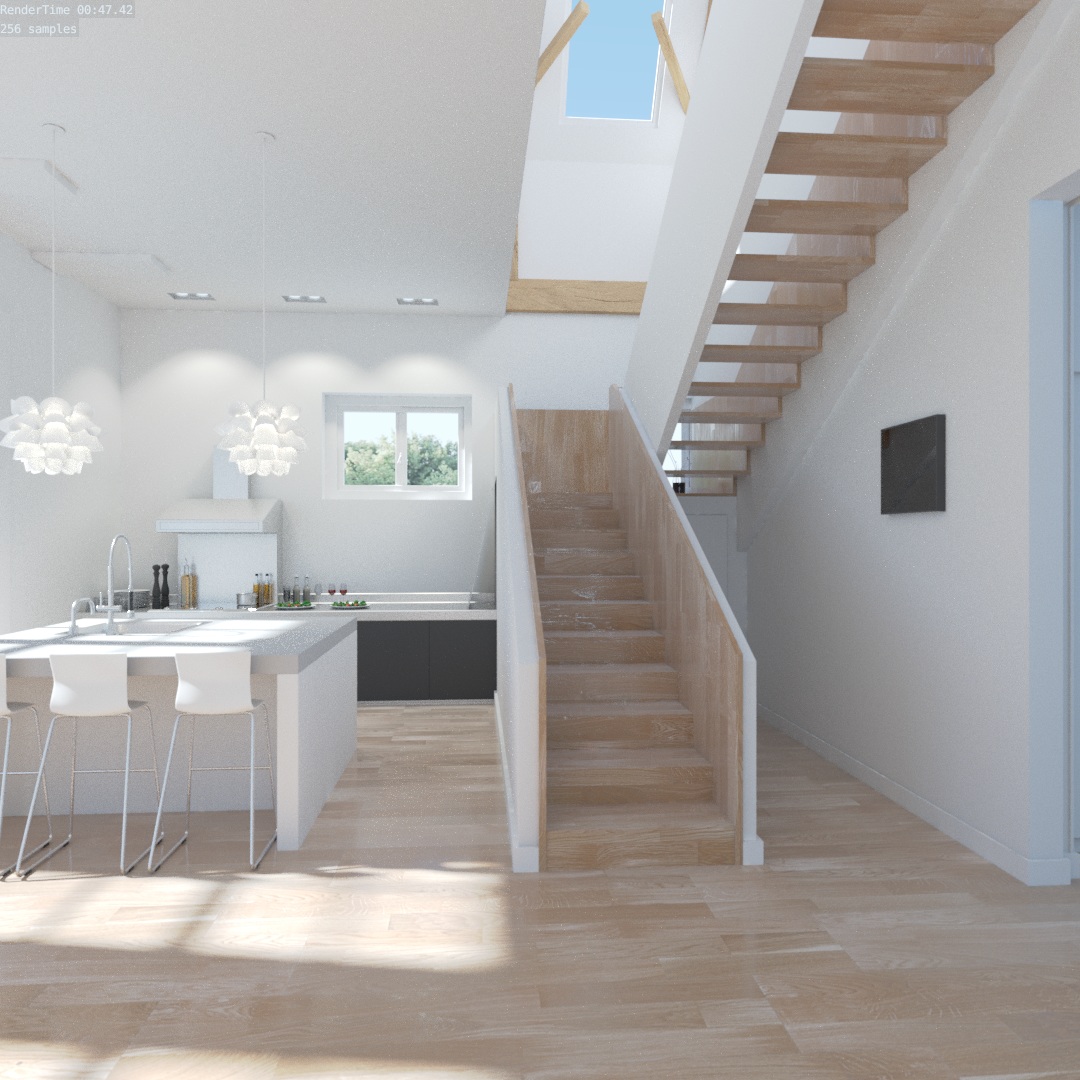
A still frame from the video below, optimized a bit more (samples, clamp).
The Blue light coming from the right is due to a wall without tickness, this should be avoided.
And the scene file so you can verify the rendertime, all credit to chocofur:
download, unzip, press f12, the baking is already done and packed
3 comments
Très très intéressant.
Cependant j’ai voulu tester le scène hébergée sur gumroad et le résultat est beaucoup plus bruité et beaucoup plus long à calculer (imagine fixe).
Est-ce qu’il y a des modifications à faire ?
Est-ce qu’il faut lancer un baking une fois l’add-on activé ?
Ou bien est ce que les drivers s’en chargent une fois le rendu lancé ?
Faut-il obligatoirement activer l’exécution auto des fichier script ?
Je n’ai pas compris le “duplicate me” lorsque l’on lance le fichier.
J’ai aussi tenté la cornel box et si effectivement le temps est bien moins long, les couleurs sont très différentes en utilisant cette technique : https://image.noelshack.com/fichiers/2017/16/1492782748-path-pathbounce.jpg
Côté gauche le rendu avec le shader, coté droit le rendu avec un Diffuse.
il faut activer les script à cause du driver
le “duplicate me” c’était un rappel pour moi.
Si les couleurs change Beaucoup c’est que tu as fait une erreur quelque part, il faut aussi prendre en compte que cette technique fait comme si il y avait beaucoup plus de rebonds.
Aussi je travail sur une autre méthode qui marche de la m^me façon mais sans avoir besoin de faire des UV, énorme gain de temps.
Sans:
https://drive.google.com/open?id=0B0i8DBtwQZ0-MWEyOU1vSzBpUjA
Avec:
https://drive.google.com/open?id=0B0i8DBtwQZ0-VUQ4elhFZUViSWM
Grain et temps de rendu
Merci pour la réponse rapide !
Effectivement, j’ai du faire un couac, j’ai relancé la scène, baké à nouveau (je n’ai pas encore fait les manip sur les drivers) et ça passe beaucoup mieux.
Quant à savoir pourquoi, c’est une autre histoire, mon baking était peut être pas bon la première fois.
Même chose pour la scène de Chocofur, avec les scripts activés ça fonctionne a merveille et c’est pas dégueu en 2 minutes 25.
Les deux rendus que tu as posté plus haut sont assez impressionnant aussi, surtout s’il n’y a pas besoin de s’occuper des UVs